17 Eyeliner Tips That'll Change Your Life
Among the long list of essential makeup skills, learning how to do your eyeliner is definitely up there! A killer wing is a complete game-changer: it instantly lifts your eye and makes them look SO much bigger. But done incorrectly, it can make your eyes look tired – thank you, next!
Luckily, there are tons of hacks to help you along the journey from beginner to pro as quickly as possible. Here are our tried and tested eyeliner tips that actually work.
Eyeliner Tip #1: Find The Right Tool

When it comes to eyeliner, there are so many different formulas and applicator tools to choose from. Each type of liner has its own set of advantages and disadvantages, so finding the right tool for your skill level and desired look is crucial. If you’re a newbie to the liner world, a pen, like our Life Liner Quick ‘N Easy, $19, is the easiest tool to use. When we designed this product, we wanted to create a liner that everyone could effortlessly use, from beginners to pros. It has a super-fine tip, it’s easy to control, and it has impeccable staying power, AKA it’s smudge-proof and even waterproof. Let’s be real; when you slay the perfect wing, it needs to stay put.
If you have a little more experience, our OG formula is another great option as it has not one but two eyeliner formulas. The Life Liner Duo Pencil and Liquid Eyeliner, $25, includes a liquid liner with a tapered brush for precise application and the most intense pigment payoff that lasts for up to 48 hours! The liner also has a creamy pencil that glides on effortlessly and lasts for eight hours of smudge-proof color. These formulas have a little less play-time, and once they’re set, they do not budge. It’s the perfect tool for pro liner lovers.
Eyeliner Tip #2: Get into Position
Positioning yourself correctly before you start your liner can completely determine the end result. First, grab a handheld mirror (even a magnifying mirror!): this will allow you to get up close and personal with your eye so you can see what you’re doing. Hold it slightly below the eye so that when you’re doing your liner, your lashes are down – it makes the process easier. Then, to steady yourself, place your elbow (of the hand you’re using to apply the liner) on a table or surface. If your hand is shaky, tense your toes to steady yourself – we know it sounds crazy, but it actually works!
Eyeliner Tip #3: Use a Pencil to Create the Shape

If you’re a beginner, start by tracing the shape of your wing using a pencil, as this is a lot easier to remove than liquid liner. Once you’ve worked out the shape, apply the liquid liner on top and neaten with a Q-tip wherever necessary.
If you don’t have time, then try a super fine-tipped pen liner, like our Life Liner Quick ‘N Easy Precision Liquid Liner, which makes drawing a wing extra easy to do, even for beginners.
Eyeliner Tip #4: Draw the Wing First
While it may seem strange to start with your wing, by beginning at the outermost corner, it’s a lot easier to get the angle right so that it lifts and snatches your eye instead of bringing it downwards. Chanel Temple, global makeup artist for Hourglass Cosmetics, agrees, “I always start with the wing by marking the outermost corner of your eye and drawing a thin line, angled slightly upward.”
Eyeliner Tip #5: Outline The Shape Of The Wing
Instead of gradually thickening the width of your wing, create the outline of the shape and then fill it in. We actually like to begin by drawing both wing shapes before working on the lash line or inner corner, as this will help you ensure the wings are symmetrical in width and angled in the same direction.
Eyeliner Tip #6: Grab a Post-it
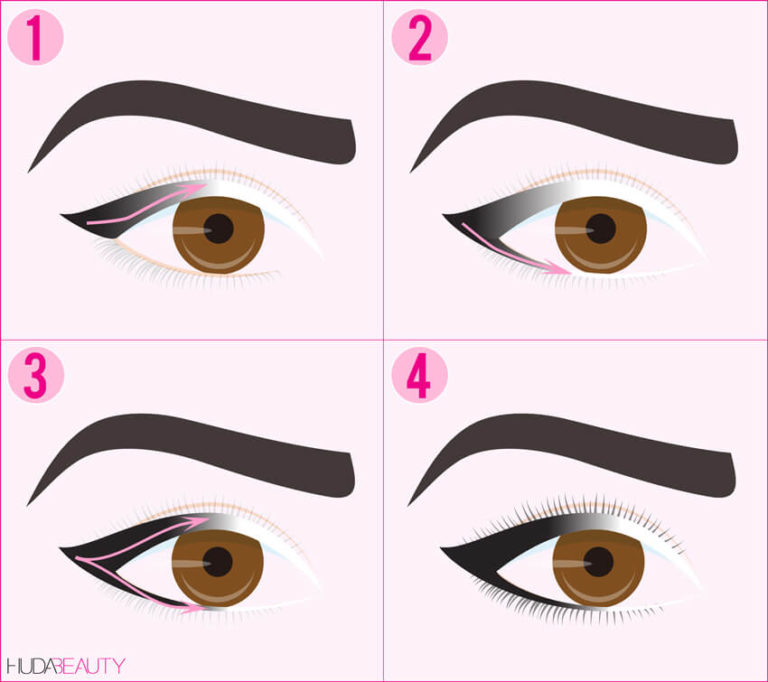
One of our all-time favorite liner hacks is using a post-it to get a clean, straight wing with the right angle! It’s so simple and makes the whole process SO much easier. Start by placing the post-it edge along the lower lash line and angle it, so it meets near the tail end of your brow. Use this edge as a guide to create your wing. Wait for the liner to set, then slowly peel away the post-it. Next, draw along your lashline to meet your wing.
Eyeliner Tip #7: Prep Your Lids
One of our biggest frustrations when applying liquid or gel eyeliner is dealing with a brush that skips. This is why when we created our Life Liner Quick ‘N Easy, $19, we designed a progressive flow delivery system that enables a constant flow of ink, so your liner glides on without skipping or pulling.
With that said, eyeliner can also skip if the skin is not prepped properly. Celebrity MUA Gina Brooke says, “It helps to hold the outer eye taut and apply the liner from inner corner straight to outer corner. By holding the skin taut, it makes the drag on the liner super easy.” Keeping your mirror low and looking down helps as well.
Eyeliner Tip #8: Smoke ‘n’ Smudge
If you’re going for a softer look, use a pencil instead of a liquid eyeliner, like the pencil on our double-sided Huda Beauty Life Liner Duo Pencil & Liquid Eyeliner. Create a small wing at the outer corner of your lashes and smoke it out using an angled eyeliner brush along the outer corner of your upper and lower lash line. The result is a soft, gorgeous smoky eye.
Eyeliner Tip #9: Find the Right Wing for Your Eye Shape
One of the most important rules when it comes to applying winged eyeliner is getting the angle of the wing right. However, this is different for everyone, as we all have our own unique eye shapes. For example, to accentuate round eyes, you can create the illusion of added width by adding a bold wing to the outer corners. If you have a hooded lid, then the type of wing you create will be very different to someone who has deep-set eyes. Play around with different angles, wing shapes and sizes, and wing placements to find the shape that you feel sexiest in.
Check out how Huda does her wing:
Eyeliner Tip #10: Set your Liner
Most liners are not intensely black, so to achieve a super matte black effect, set your liner with a powder or pencil liner. This will help it stay in place all day long and fill in any areas where the pigment isn’t as intense. Simply use a sharpened pencil or a black eyeshadow with a flat angled brush and pack the shadow over the liquid liner.
Alternatively, if you’re a liner lover, you can grab our OG Life Liner, $25, or if you’re a novice, the Life Liner Quick ‘N Easy, $19. Both formulas are the blackest, mattest, and most intensely pigmented liners on the market, so there’s no need to set it for extra impact, plus it won’t budge!!
Eyeliner Tip #11: Try Tightlining
Tightlining your waterline on your upper lashes is another crucial step to achieving the perfect liner look. It helps create the illusion of thicker lashes and adds drama. Avoid going too far in and apply the liner to the center only, so the liner won’t smudge or run. You can also use a nude pencil along the lower lash line to open up the eye.
Eyeliner Tip #12: Try the Dot-to-Dot Method

Celeb MUA Gina Brooke shared her fave hack for slaying a winged liner, and it’s so simple, “I love the dot-to-dot method on liquid liners, especially the ones with flimsy brushes or if you have unsteady hands. Create a line of dots on the upper lash line that are close to each other and then connect them with a straight line to create the perfect liquid liner.”
Posts You'll Love:
Eyeliner Tip #13: Line Your Inner Corner

Lining your inner corner is super trendy right now, but we’ve been doing it for as long as we can remember – it’s the classic Middle Eastern way to wear eyeliner.
If you’re a liner newbie, this can easily go wrong… Unless you have our Life Liner Quick ‘N Easy, $19, of course (shameless plug we know!), which makes getting a tiny, precise line extra easy, and it won’t smudge or run. Once you’ve nailed your wing, to make your eyes look even bigger, trace your tear duct with liner along the upper and lower lash line.
Eyeliner Tip #14: Correct any Mistakes Later
“If you make a mistake, LET IT DRY,” advises Glamsquad artistic director Kelli J. Bartlett. And while you may think this is easier said than done and a dried line won’t budge, her top tip for foolproof cleanup is easy AF. “Saturate an angled brush in makeup remover (I love Lancôme Bi-Facil Double-Action Eye Makeup Remover, $30) and wipe away whatever you don’t want to see, making sure you clean the brush on a tissue in between strokes. The one exception to the ‘let it dry’ rule is if you’re using Huda Beauty Life Liner, as once it sets, it’s set!
For touchups, our campaign model and MUA extraordinaire, Celine Baernaerts, recommends My Mini On Point Buds by My Kit Co, $5. She insists they are the skinniest, best Q-tips you’ll find in your life!
Eyeliner Tip #15: Monolid Floating Liner Hack
To create a bold liner look on monolids, instead of drawing directly along your upper lash line, draw your wing floating above your lash line for a perfectly dramatic and sexy wing.
View this post on Instagram
Eyeliner Tip #16: Try an eyeliner stencil
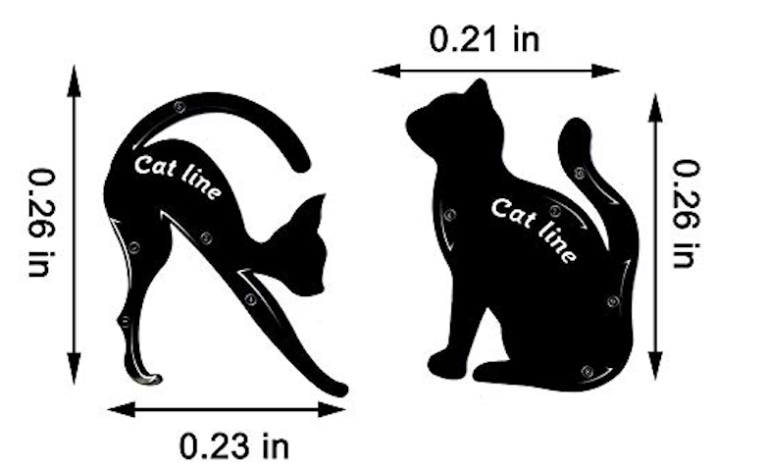
If you need a little extra help, there are now tons of eyeliner accessories. From cat-shaped stencils (how adorable) to stickers in the shape of a wing that you place on your lid. Although one of our faves is the Quick Flick Eyeliner, $28, the tool comes pre-loaded with ink, and all you have to do is simply press the stamp onto the corner of your eye, connect the wing to your lash line, and you’re good to go. Read our full review here.
Eyeliner Tip #17: There’s Always Permanent Eyeliner!
 Source: DominiqueBossavy.com
Okay, now we’ve arrived at the last resort! If you’ve tried all of these tips, and applying eyeliner just isn’t your jam, you could opt for a more permanent solution: tattoo eyeliner. Permanent eyeliner isn’t going to wash off with the rest of your makeup at night, so you don’t need to worry about reapplying every morning. It’s completely customizable, so you can opt for something really natural or more intense. Find out more deets about tattoo liner here.
Are you guys as obsessed with liner as we are? Let us know in the comments below.
Disclaimer: Every product we review has been independently selected and tested without bias by our editorial team. We never take payment to review products, although some brands allow affiliate links, so we may earn a commission if you purchase a product by clicking on one of our links.


 Daily Habits Will Give You Better Skin")


Leave a comment