My Fav Hair Mask Of All Time (Is Under $5)!
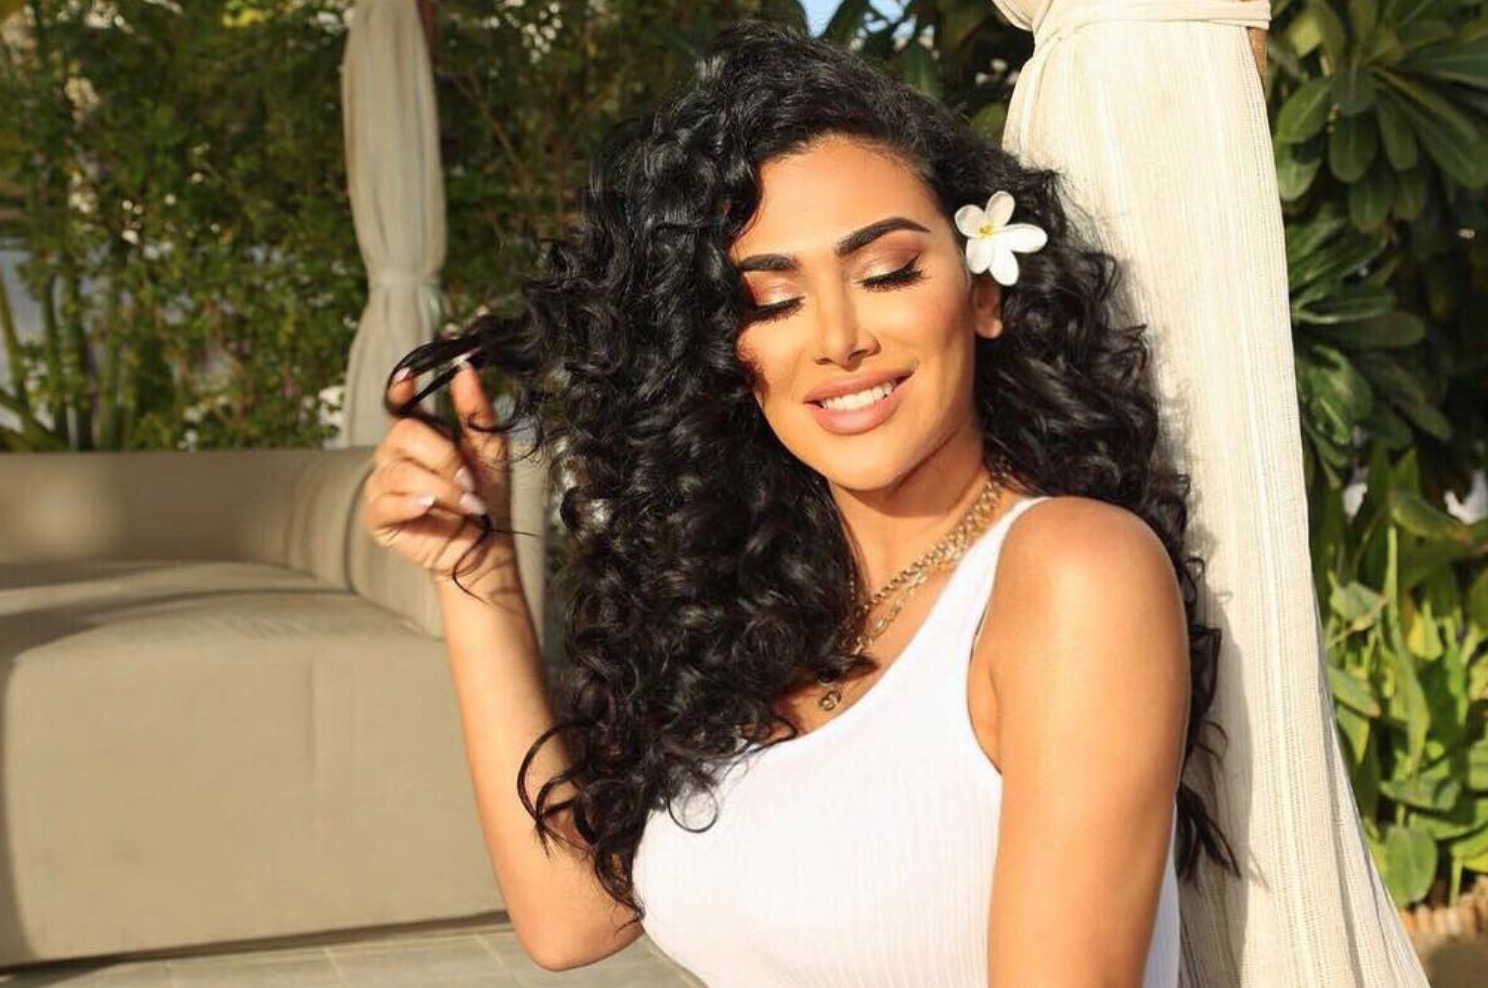
Hey my loves! This year I’ve decided to embrace my curls and wear my hair natural a lot more often! I love when my hair is blow-dried into big soft curls, but it’s also not the healthiest thing to do to my hair all the time, plus I’m really enjoying the change of having my hair curly. It’s also so good that when I let my hair do its thing without straightening it, I can leave a lot of conditioning products in, which not only makes my hair feel super soft and healthy but keep my curls looking really sleek and tight. Here’s my current curly hair routine:
Step 1: Brush!
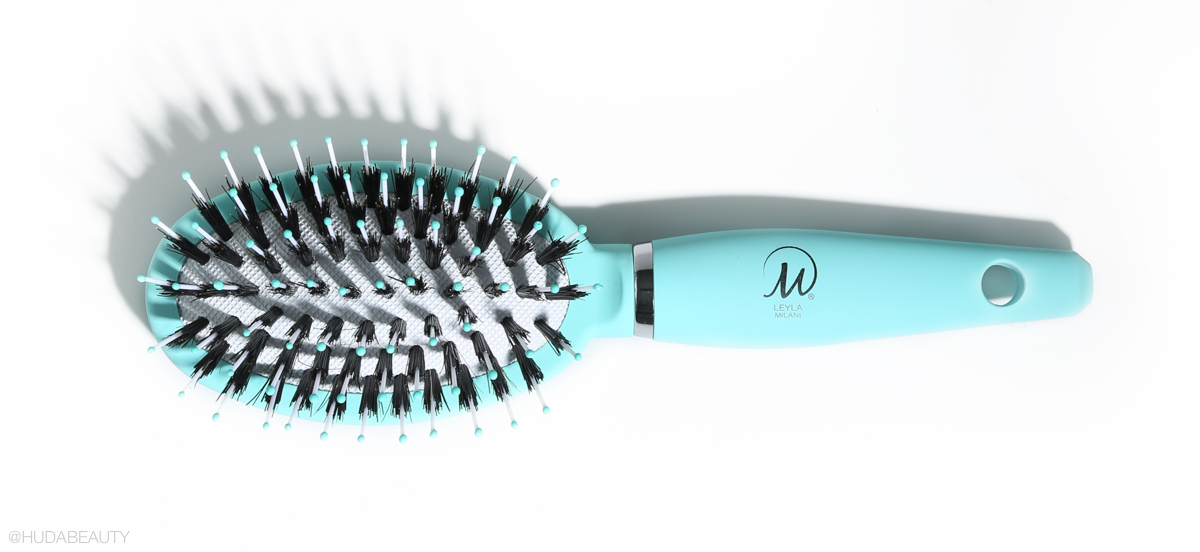
Perfect curls start with the right products and washing routine. I always brush my hair before I wash it; this is key because you don’t want to brush it when your hair is wet as this can damage it. I LOVE the Leyla Milani Miracle Brush, $25, it uses natural boar and nylon bristles, and it’s amazing for detangling my hair without damaging it.
Step 2: Wash
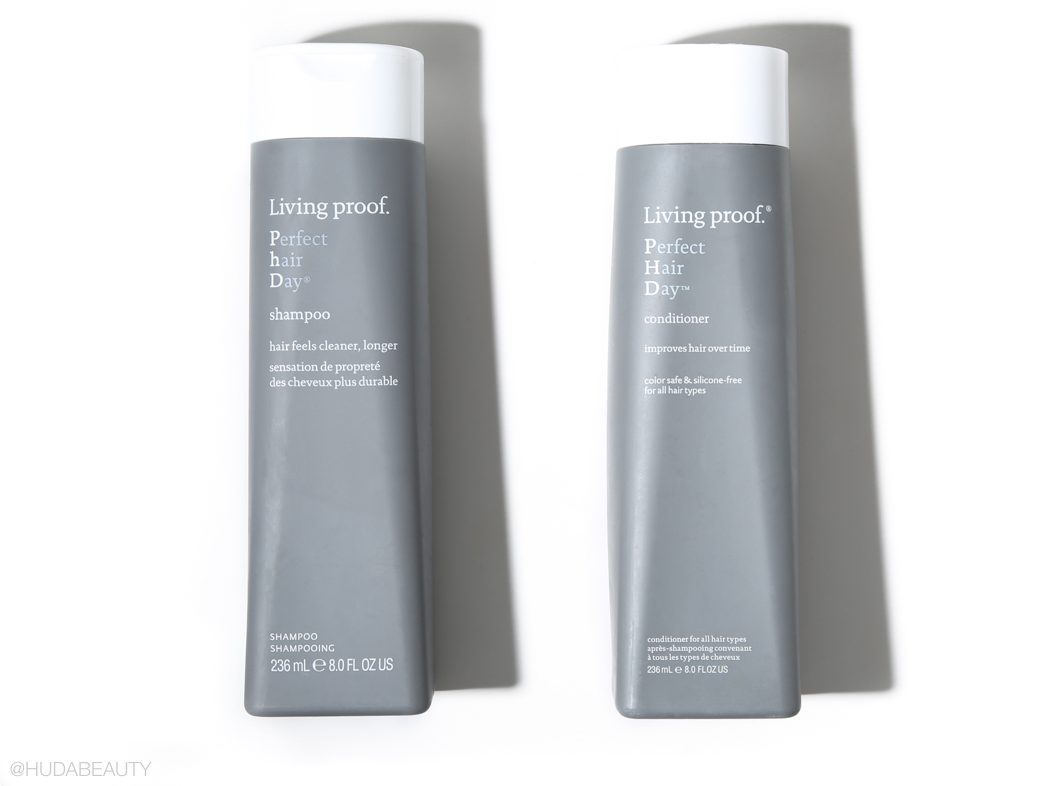
My holy grail shampoo and conditioner is Living Proof’s Perfect Hair Day, $25. I’m always trying out new products, but I always come back to this; it makes my hair feel super smooth, look really healthy, and it gives my hair loads of volume. The trick is to focus shampoo at your roots so it can address oil build-up and dirt, and then apply conditioner on the ends and mid-lengths of your hair, where it needs more moisture and TLC.
Step 3: Condition

I like to do another step to really nourish my hair. I’m obsessed with Pantene’s 3 Minute Miracle Mask, $5, so once I’ve washed out my conditioner and got out of the shower, I add a coin-sized amount of this mask and comb it through my hair with my fingers while it’s still soaking wet. It contains 80% more conditioning ingredients than a regular conditioner and because it has crazy high levels of Terminal Amino-Silicones (TAS), that smooth and flatten the outer cells of the hair cuticle, it keeps hair protected and decreases moisture loss.
I also add a few drops of grapeseed oil, which is basically a supplement for your hair as it contains vitamin E, linoleic acid, and lots of proteins and minerals that are ideal for hair health. It’s a very light texture, so it won’t make your hair feel at all greasy.
Step 4: Drying

Whenever I don’t have to style my hair for a shoot, I always leave it to air-dry. Not only is heat damaging to your hair – unless you’re using your cool setting – but I find that I get the best natural curls this way. While my hair is still damp, I rub some Curly Pudding between my palms and rake it through my hair, scrunching up my curls. The Curly Pudding (only $7!!) is a new product I discovered in the US, and I’m in love with it; it smells SOO divine and creates really perfectly defined curls. It uses shea butter, sweet almond oil, and avocado oil, so it nourishes while it works.
If I wash my hair in the evening before I go to bed, I loosely pile my damp hair on top of my head (check out why you shouldn’t be tying it up while you sleep!) and put a towel down so that it can dry overnight. This gives it really good volume and keeps the curls nice and tight.
Mid-week top-up!
Curly hair can get frizzy really easily, so if I need a quick pick-me-up during the week, I’ll spritz a little water into my hair and rub a little of the 3 Minute Miracle Conditioner or Curly Pudding through it, and it gets the curl back and improves the appearance of frizz. It’s so easy, especially if you don’t have time to wash mid-week!
I also highly recommend using a silk pillowcase – if your hair is curly like mine, you will notice a huge difference. It’s not just good for your hair long-term, but it also keeps overnight frizz in check (see why here).
Let me know if you guys have any tips or recommend any products for curly hair in the comments below. x


 Daily Habits Will Give You Better Skin")


Leave a comment