I Got My Brows Microbladed And It’s Not What You Expect
I’d been thinking about microblading for a really long time, and it got to the point where my brows were becoming a frustrating part of my makeup routine. I was spending so much time on my brows every day, it would take me five to ten minutes, even 15 minutes sometimes, which is ridiculous – I mean who has time for that?! But I just had so many sparse patches, missing hairs, and with my love for bold brows, they were just too thin; I hated how they looked without makeup, and they made me look much older. So, I’d do my brows every day, but the more products I used, the more my hairs kept falling out, and it became a vicious cycle. I literally felt like I needed to get my brows microbladed to limit the amount of product I needed to use, and of course, to give me more precious minutes in the day. I’ll be honest, I had no idea how much work you need to put into the process, so I hope you can learn something from my experience if you’re considering microblading…
What is microblading?
Microblading is basically a permanent solution for full, flawless brows. The process is a little like tattooing, although microblading only lasts between 6 months to 18 months, depending on your skin (it stays longer in dry skin types). Using a unique microblading blade, special pigments are deposited just under the epidermis, above the dermis, in fine lines that mimic real brow hairs. The result is natural-looking brows made up of tiny little hair-like lines. The actual microblading process will usually take between 30 minutes and 1 hour, depending on how much filling in you need. If you use Roaccutane medication, you can’t be treated until 6 months after your treatment has finished. Similarly, if there is any bruising, cuts or pimples in the area on the day, the procedure should not be performed. Check out 5 things you never knew about microblading here.
Finding the right artist!
Brows are super important, so you want to go to the right person. I did loads of research online, scoured Instagram, and I came across the awesome Microblading LA team. The founder, Lindsey Ta, is amazing, I really liked her style, the shapes she did, and the fact that she did this gorgeous Ombré effect, so that the brow was lighter at the front, darkening towards the outer edge, which made the brow look so much more natural (check out her insta here). I got in touch, and she was super sweet and came to our house to do both my sisters, Mona and Alya’s brows, and mine as well.
The Process:
Honestly, I thought it was going to be super painful, but it was more like a scratching feeling, and I wasn’t too uncomfortable. Although we did the numbing process first, we spent a long time on the brows, so by the end, I could feel the strokes a lot more, and although it was bearable, it did start to hurt a little.
Step 1: Numb the brows with topical anesthetic for 20 minutes.
Step 2: Draw on your dream brows and perfect the shape.
Step 3: The microblading pen is dipped in ink before each hair is drawn. This can take 30 to 45 minutes.
Step 4: Once all the lines are drawn, the ink is applied all over the area to increase the pigment that can be absorbed into the skin. Let set and dry.
Step 5: Wipe away the excess ink to reveal your beautiful brows.
Step 6: If any touch-ups are necessary, the process will be repeated again.

The Result:
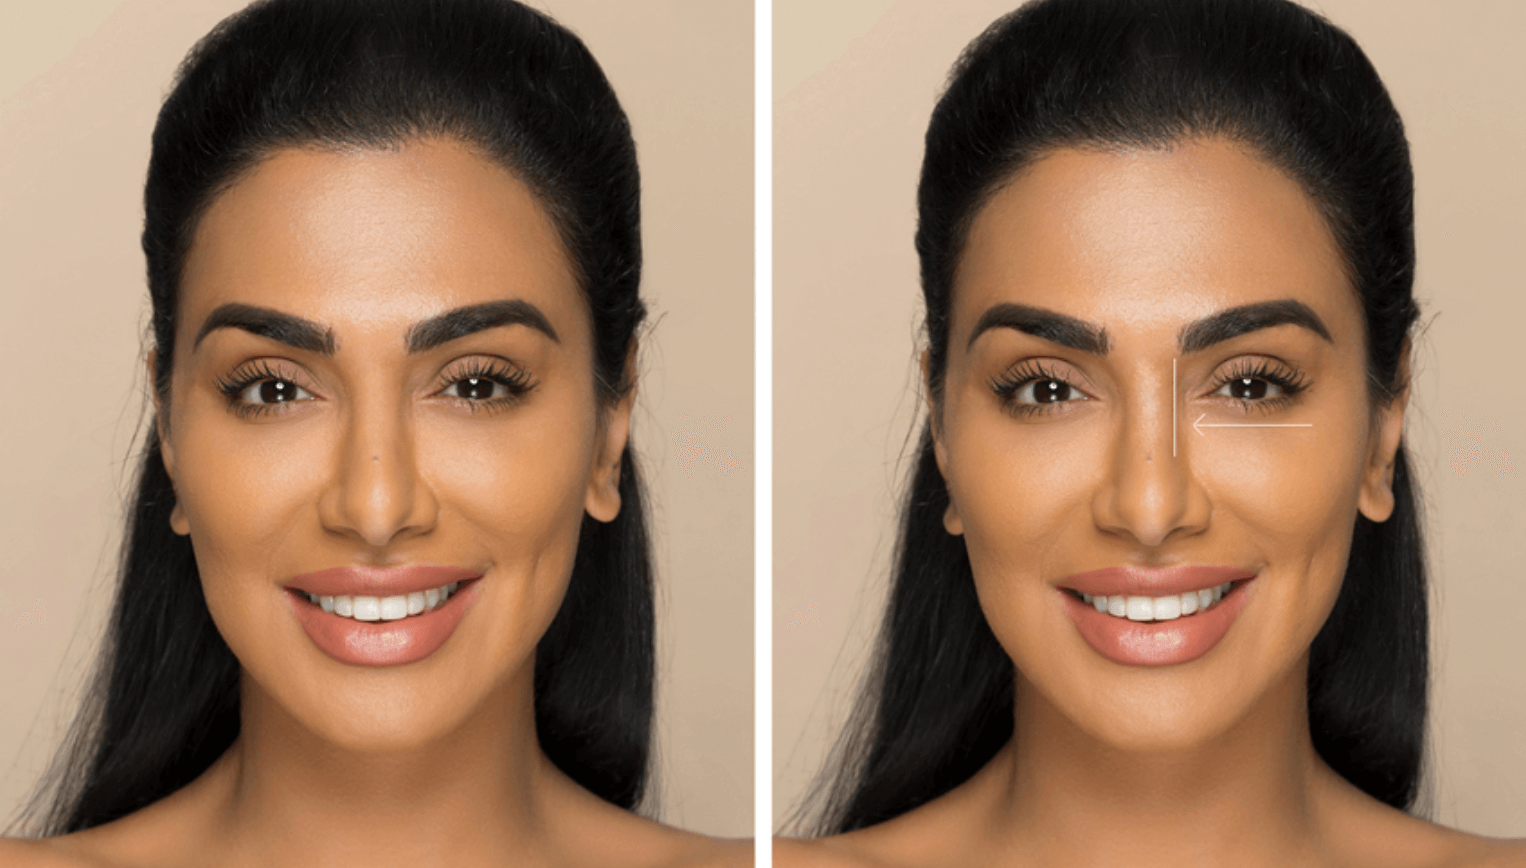
I was really particular (I’m a perfectionist), so we spent a long time working on the shape, the style of my brows, and touch-ups. Having my brows microbladed has honestly saved me SO much time, and even though I still use my brow products, I don’t need to use half as much! I’m so glad I got them done, because now that I have the shape done as a template, it’s just a case of adding definition and taming stray hairs, which takes me just a couple of minutes.
Because we took so long, one of my brows started to swell a little, and I think because of that, one of my brows ended up looking a little bit higher. If you’re very particular with your brows, it’s better to start off with fewer hair strokes, and then you can always go back and fill them in. For me, I feel like some areas look a little too dense, and the pigment is a little harsh, so sometimes I add a bit of foundation on the areas to correct it.
In most cases, you’re meant to go for a touch-up – I only did one application because I just wanted a very light brow, so that it was more natural-looking, but I can go for a touch up in six months, and the effect will still be light and natural. Overall I love the fact that microblading makes getting ready so much quicker, and I’m definitely happy I had it done, but being so precise about the shape of my brows, I found it really hard allowing someone else to ‘design’ my own brows.

If you have very thin brows and are looking to fill them out as naturally as possible, or simply don’t have time to fill in your brows every morning, I definitely recommend microblading. Make sure you do a thorough consultation with your brow artist first, and you’ll love the results!


Leave a comment