How I Get Rid Of Stubborn Acne Scars With These 3 Things

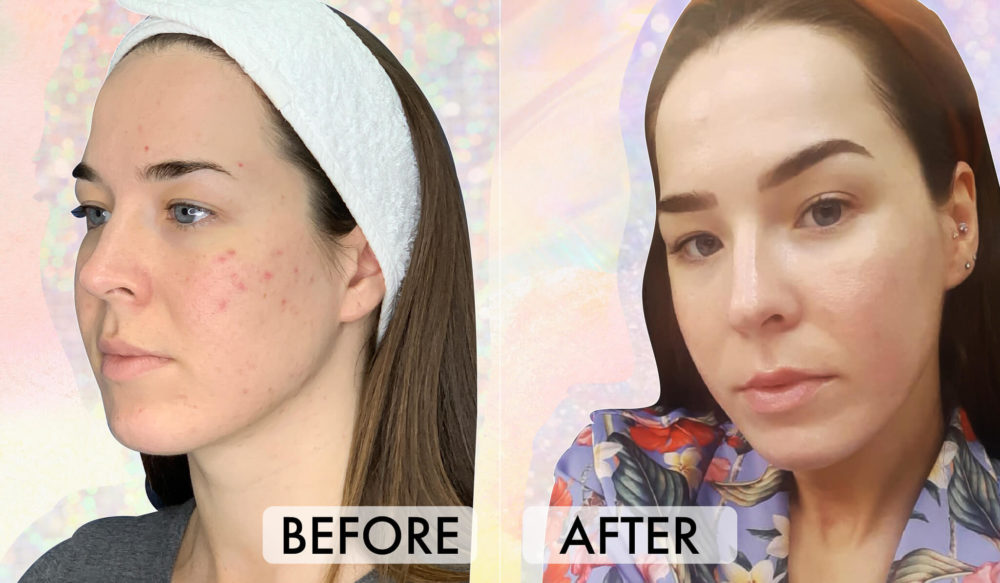
Hey my loves! Since I started blogging over 10 years ago, I’ve been on a real skincare journey. I’ve tried hundreds of products, spoken to tons of derms and experts, and tried all kinds of skincare techniques. As an adult, I had bad cystic acne, and once I’d managed to get that under control with a lot of trial and error, the next step was to try and get rid of the resulting marks left behind.
It’s also important to clarify that when I refer to my acne scars, I am talking about post-inflammatory pigmentation, which is the scar-like mark that is left after a pimple, while dermatologists consider a true scar to be a change in the texture of the skin (you can find more treatments for acne scars here). I’ve been doing this acne scar ritual for years, and every time I get a new acne scar, I know exactly how to deal with it. This is the three-step process and the products I absolutely swear by:
Step 1: Dermarolling – Aka Micro-Needling
What it is: This is actually magical for a multitude of skin issues! A dermaroller is covered in tiny little needles that you roll across your skin (trust me on this!), which cause tiny abrasions. Your skin reacts with a rush of blood and collagen, which repairs the area and builds new skin cells. The collagen boost improves skin’s elasticity and plumps your skin, all while diminishing scars and fine lines.

How to use it: For best results, dermarolling should be done when the scars are new. However, ensure that the pimple has completely gone, as if you use it directly on any live acne, this will spread bacteria. I do this as part of my evening skincare routine, as you shouldn’t put makeup on your skin for at least 12 hours after dermarolling. Start by double cleansing, then use a toner to ensure all traces of makeup have been removed. Now that your skin is clean, move the dermaroller slowly and gently across the areas that you want to target.
After, you can apply a repairing serum, and because of the tiny holes in your skin, it will be absorbed into your skin much more efficiently. Remember to clean the dermaroller with rubbing alcohol before and after every use, and store it in a plastic case. You should replace your dermaroller regularly, and use a new one after five to six uses. Check out our full guide to dermarolling at home.
Posts You'll Love:
Where to get it: Dermarollers aren’t expensive, and you can find them easily online for around $10. Anything below 0.3 mm needle length won’t make a huge difference to your skin, but at 0.5mm you can use your dermaroller every one to two weeks – this is also a good option if it’s your first time dermarolling. 0.75 mm and 1.0 mm will have the best effect (I use 1.0mm), but I would avoid doing this more often than once a month.
Step 2: Institut Esthederm E.V.E. Cell Regeneration Serum

The Institut Esthederm E.V.E Essential Vital Elements Serum, $100, is ahhhhmazing – it literally makes new skin! It’s so scientifically advanced that it contains substances found in skin tissue, like 21 amino acids, mineral salts, vitamins, and a ton of other genius peptides. These Essential Vital Elements (E.V.E.), provide the perfect environment for skin to naturally regenerate, thereby improving scars, filling wrinkles, and plumping your skin. I use this serum whenever I have a new scar – I can’t recommend this highly enough. Although I do recommend using it only at night as it’s not the best for wearing under makeup.
Step 3: Red Light Therapy

What it is: Let’s just start with the fact it’s based on technology developed by NASA to heal wounds! It’s the final step in the ultimate acne scar-fading routine. The red light increases energy in your skin, which triggers a series of reactions that result in new collagen forming. Red light boosts collagen unlike anything else I’ve tried, and it really does work wonders for scars, and wrinkles too. Your skin will glow instantly!
How to use it: I use red light whenever I have time (even on flights). You just gently move the red light device over your skin in different sections for a few minutes at a time or you can hold the red light on areas that you want to target.
Where to get it: I’ve been using the Quasar MD Plus, $399, for years, and although it’s definitely not cheap, for me, I have definitely got my money’s worth. You can also try the Quasar MD Pure Rayz, $199, which is slightly smaller but just as effective. The Project E Beauty RED Light Therapy Machine, $80, also comes highly recommended and emits 660nm light, which studies show is the best wavelength for skin rejuvenation.
By doing all three steps, I manage to get rid of my scars entirely, and I know the full process isn’t the cheapest, but it honestly does work. You could always start with just one of them, but I would recommend doing at least two of the three steps: For a cheaper option, I would use the derma-roller and E.V.E. Serum, or you can do the E.V.E. Serum and the red light therapy.
Posts You'll Love:
It’s also super important to wear SPF 30 with 5-star UVA protection, every day, as the sun breaks down collagen in your skin and can make acne scarring worse. Another more affordable way to fade scars is to regularly rub oil (like Bio-Oil, $9 or Vitamin E oil) into scars, which will stimulate blood circulation and should help to diminish scars. Remember every scar is different, and sometimes you just need to be patient to see results. There are also some amazing in-office treatments that work well to get rid of scarring, check out the best treatments for getting rid of acne scars.
Also, just an FYI that nothing in this post is sponsored, I really love these products, and I think they work amazingly. I hope this helps and please comment below if you have any questions or tips you’d like to share.


Leave a comment