5 Hacks That’ll Take Your Makeup Game To The Next Level
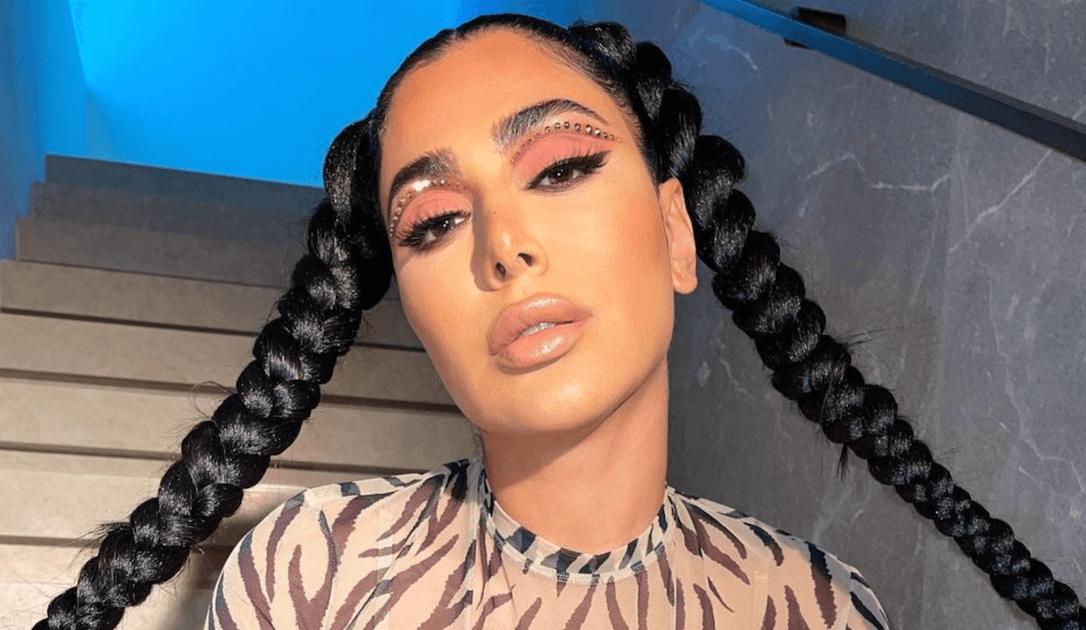
Makeup artistry is by definition an art, and while we may not all be experienced makeup artists, there are tons of simple and easy-to-perfect makeup techniques that’ll instantly elevate your game. From our ride-or-die eyeshadow technique to the brow rule everyone needs to know, here are five makeup hacks that’ll take your makeup game to the next level.
1. For Flawless Eyeshadow: Halo eye
View this post on Instagram
A halo eye has been our go-to eyeshadow technique for years as it instantly opens up and exaggerates the eye. Plus, once you learn the basic technique, it’s so versatile as you can play with different textures and colors, or even experiment with negative space or adding a graphic line. If you’re wondering, what’s a halo eye? It’s an eyeshadow look that’s created by using light or bright colors in the center of the eyelid, which is contrasted by darker shadow on either side. Here’s our step-by-step guide:
Step 1: For a flawless halo look, start by creating the contrasting shadow on the inner and outer corner of the lid. Taking a small fluffy brush, pack the shadow onto the outer corner, buffing the eyeshadow into your crease. For more drama, apply the deeper shade along your lower lash line as well.
Step 2: For the center of the eye – the halo – you want the pigment to pop, so pack the eyeshadow onto the lid with a flat brush using small tapping movements, then blend outwards for a less structured, blended finish. Finally, to play into the halo effect further, use a shimmer shadow on top to accentuate the light of the halo, then add a little shimmer directly below on your lower lash line. For more tips and major inspo, check out our halo eyeshadow look book.
2. For Perfect Brows: Bring Your Brows Closer Together
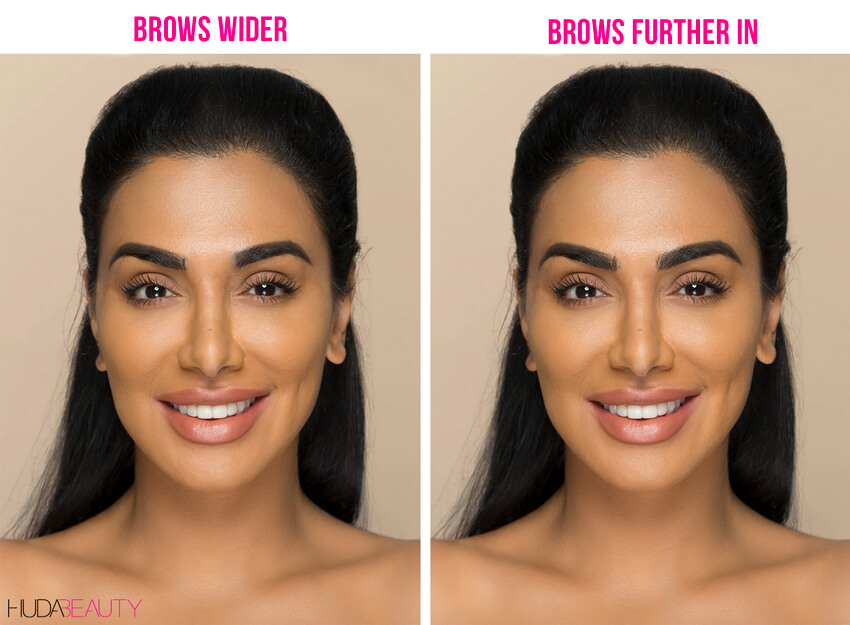
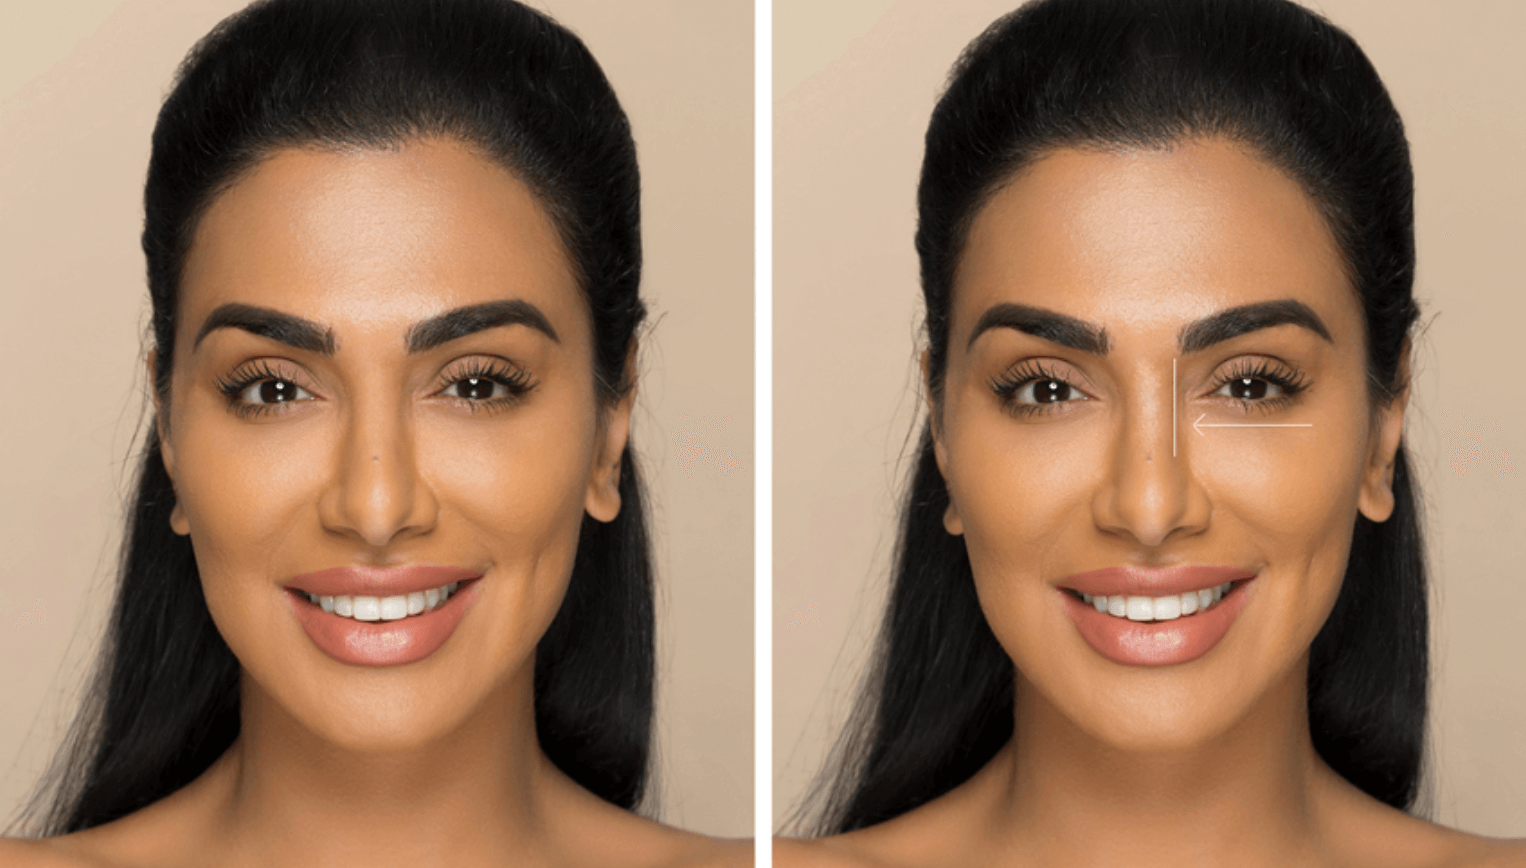
This brow hack is so simple, and yet it can make your brows look more sculpted, your nose more chiseled, and overall, help your face look more balanced. Needless to say, we’re obsessed. Literally, just by taking your brows further in by a few millimeters can make a big difference. Now, it might also be that one of your brows is naturally further in than the other, so it might even be a case of just needing to pencil-in one brow to make sure the brows are more evenly matched.
If you look at the image above, we’ve digitally edited the picture on the left so that the space between the brows is wider. You can see that by bringing them closer together, the face looks more harmonious and proportionate.
When bringing your brows together, always start off by gradually working your way in as you also don’t want them to be too close together. Use a brow pencil to create hair-like strokes, and gradually work your way in one hair at a time, to see what looks good on you. To determine where your brows should start, take a narrow makeup brush and hold it vertically at the side of the tip of the nose to measure where your brow should begin. Although, remember this is just a general rule and we all have different features, and therefore, it’s always best to experiment to see what looks best on you.
3. For a Polished Look: Makeup Harmony
View this post on Instagram
As soon as you learn about this makeup hack, you’ll realize it’s the MUA rule for slaying a flawless beat. The makeup technique we’re referring to is known is all about creating ‘makeup harmony’ and it allows you to create a beautiful polished look every. single. time.
Creating a harmonious makeup look essentially means using the same color palette for your eyes, cheeks, and lip color. For example, if you’re donning a cute coral lip, opt for an orange-toned eyeshadow and a peach-coral blush. Of course, there’ll be times when creating a monochromatic makeup look is more difficult, as you can’t always use the same lip, cheek, and eye color, like if you’re wearing a neon eyeshadow you probably wouldn’t apply a neon lipstick or blusher. In this case, focus on creating a harmonious makeup look with a blush and lip color that complement the bolder shade.
Posts You'll Love:
4. For Bright Under Eyes: The Ultimate Concealer Hack
If you feel like your concealer never gives you the coverage you want, then this hack, made popular by the drag community, is about to become your go-to. The hack makes even your medium-coverage concealers more intense, and the trick is surprisingly simple…
Start by applying a thin layer of concealer to the areas you want to target, then leave it for between one to three minutes – experiment to see which timing works best with your formula. Essentially, this ‘drying’ time helps the concealer set on your skin, therefore when you go to blend, it’s almost semi-dry, so it doesn’t disappear into your makeup sponge. Be warned – you want to catch it just before it completely sets so that you’re still able to blend it out. For more tips, check out our full guide.
5. For The Perfect Wing: Grab A Post It

One of our all-time favorite liner hacks for slaying the perfectly angled wing is using a post-it! It’s super basic but it makes the whole process SO much easier. Start by placing the post-it edge along the lower lash line and angle it up toward the tail end of your brow. Use this edge as a guide to create your wing. Wait for the liner to set, then slowly peel away the post-it. Next, draw along your upper lashline to meet your wing. We love this hack as it’s great for beginners. Plus, once you familiarize yourself with the right angle of the wing, it’s easier to draw it free-hand!
For more amazing tips, check out 14 eyeshadow tips that’ll take you from beginner to pro.







Leave a comment