Cream Contour 101: How To Do The Ultimate Natural Snatch

Contouring has evolved a whoooole lot since 2012 — the era of tiger-stripe contouring, popularized by MUA Scott Barnes, which had everyone and their mamas sporting intricately placed brown and beige streaks for perfectly chiseled features. Fast forward to 2015 and the introduction of ‘clown contouring.’ Spearheaded by Youtuber BellaDeLune, this genius and artsy technique entailed applying contouring, brightening, color-correcting, and blusher shades, all at once, in a clown-like makeup style that once blended, provided sun-kissed and sculpted results that were just beyond.
But as the body positivity movement gained momentum, we saw the heavy-duty contouring style gradually fizzle out as beauty lovers began to embrace a less-is-more approach with cosmetics. Today, contouring is all about enhancing (rather than restructuring), adding some soft dimension to the high planes of the face. So today, we’re giving you a lengthy lowdown on all things cream contouring — from application, worthy tools, and must-have sculpting formulations, we covering it all boo!
Step #1: Finding Your Cream Contour Grail Product (and Shade)
Contouring palettes used to be a necessity back in the day, but those six-piece pans don’t come cheap! As techniques have evolved, so have our tools, and thanks to the beauty of TikTok tutorials, we’ve learned to achieve flawless contours in a myriad of ways, using products we already have in our makeup arsenal. For us, when cream contouring is involved, we don’t necessarily have a go-to item. Depending on the makeup style we have in mind on a particular day (or whatever’s within arm’s reach to be quite honest), we tend to alternate between the below:

Sources: Sephora, Ulta + Huda Beauty.
Option 1: Cream Concealer
When selecting a defining concealer shade, a general thumb rule is to choose one that’s two shades darker than your complexion for more legit shadows. Texture-wise, look out for formulas that aren’t fast drying and provide medium to full coverage, for seamless and streak-free blending. Just like everyone else, we’re obsessed with the Too Faced Born This Way Multi-Use Sculpting Concealer, $30, but for beauties on a budget, NYX’s Can’t Stop Won’t Contour Concealer, $9, lives up to its hype.
Option 2: Cream Foundation Stick
We always say that you should never confine a product’s function to just its label, you’ll be so surprised at the multitude of tricks you’ll discover while playing around. One hack we unearthed way back was using foundation sticks in place of contour sticks. We seriously swear by this as saturated color and peak blendability are always guaranteed with this trick. Bobbi Brown’s Skin Foundation Stick, $49, is a cult-fave for MUAs as it glides on and melts like butter, offering skin-like coverage that gives off the illusion of real-life snatched angles.
Option 3: Cream Bronzer
If you find cream contour products a little too heavy, and cream bronzers a little too warm, our Tantour, $30, is the perfect medium. This cream-to-powder contour and bronzer hybrid is our current summer staple for a quickie bronzed and chiseled finish. The formula comes in five shades and add the perfect amount of bronzed contour for your skin tone!
Step #2: Picking The Right Tools

Sources: Huda Beauty + Ulta.
Now that you’ve got your cream contouring product down, it’s time to pick out your tool:
For cheeks:
- If cream concealer or cream foundation is your formula of choice, use a damp beauty blender like The Basic B Sponge Applicator, $17, for easy blending and blurring.
- And with a cream-to-powder bronzer, a dense angled brush like our Sculpt & Shade Face Brush, $28, will allow you to line and buff out your contours within seconds.
For the nose:
- Small areas like the nose require a bit more precision so a small shader makeup brush is our usual tool of choice. To further blur your contour lines, we like to use a small blending brush and tiny amount of cream foundation to soften these shadows. Real Techniques offer an insanely affordable Eye Shade + Blend Duo Pack, $9, that consists of both, and the quality of their bristles are ELITE.
Step #3: Prepping Your Skin
Finally, onto the fun part!
This is an obvious but necessary step that’ll ensure your contours are smooth and not streaky. Five words of advice? Primer is your best friend! What a good-quality primer does is act as a skin-smoothening covering — filling in pores, blurring out fine lines and blemishes, and keeping oily patches in check to create a silky skin canvas that’ll elongate your makeup’s staying power.
Two prime perfecters:

Sources: Ulta + Sephora.
- A Budget Buy: e.l.f. Poreless Putty Primer, $9. This best-selling formula is infused with squalene for soft hydration, leaving skin feeling ridiculously soft. From quality to price point, this is just…*chefs kiss*
- A Boujee Buy: Benefit The Porefessional Pore Minimising Primer, $32. The consistency of it is an absolute dream, providing an ultra-smooth and velvety base that soaks up surface oils for a shine-free and even skin texture.
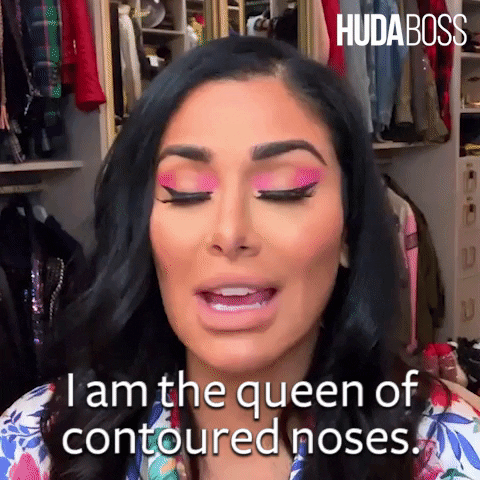
Step #4: Mastering the Art of Nose Contouring
 via Giphy
No one does a snatched faux nose job contour better than Huda, and her step-by-step guide goes a little like this:
- Using a brown contouring shade, draw two lines up the bridge of your nose, all the way up to the inner brows.
- Next, draw a soft line around the tip of your nose for some added definition.
- Then, with a small eyeshadow blending brush, use our Faux Filter Stick Foundation, $39, to blend out your lines. This will leave you with natural contours that look like actual shadows coming from within.
You’ll probably notice that Huda uses a contouring powder in her IG demo below, but cream contouring products can be applied in the exact same way. Just make sure to include a light dusting of translucent powder as a final step to ensure your shadows stay in place all day.
View this post on Instagram
Step #5: Sculpting Out Your Cheeks and Forehead
- For defined cheekbones: Apply your cream contouring formula in dots or a solid line, starting from the ear, moving the line just below the hollows of your cheeks, and ending it directly adjacent to the outer eye.
- For the illusion of a shorter face: In small, short streaks, and quite close to the hairline, add your contouring shade to the corners of your forehead, lessening the pressure of your brush as you sweep it down for a more gradient shadow.
- Then with a beauty sponge or the fluffy side of our Sculpt & Shade Face Brush, blend and buff the lines in circular upward motions for a more lifted finish.
TikTok on Trial: Skull Contouring
As of like, yesterday, there’s a new (genius!) cream contouring hack in town and it’s going viral on TikTok. Ever heard of ‘skull contouring’? We can’t get over the level of creativity! Watch Huda recreate EMIL’s (@emilwarren1) brilliant snatch and lift trick below:
View this post on Instagram
Looking for additional tips on how to contour your specific face shape? Check out this epic guide for full deets.
Disclaimer: Every product we review has been independently selected and tested without bias by our editorial team. We never take payment to review products, although some brands allow affiliate links, so we may earn a commission if you purchase a product by clicking on one of our links.


 Daily Habits Will Give You Better Skin")


Leave a comment