How To Do A DIY Brazilian Bikini Wax: The Ultimate Guide
 via Giphy
DIY Brazilian wax: it’s just three words, but it has the power to strike fear deep into our… You get the drift. And if you’re a fan of the ‘less is more’ approach to pubic hair, then it’s possible you’ve subjected yourself to a Brazilian wax or even considered doing it yourself. Because let’s be real, regular salon appointments can be expensive to keep up (paying for pain’s hard to rationalize) and it’s a kinda uncomfortable experience. So that’s why we’ve become pretty great at doing a DIY bikini wax at home. To guarantee we covered all the bases, we spoke to Dani Kirk; our go-to beauty therapist at award-winning Dubai salon, Essa Beauty. Here’s everything you need to know to have salon-worthy waxing skills…
3 Essential Rules of DIY Waxing
Before we get into our step-by-step guide, there are some things you need to know before you turn up the heat:
Rule 1: “Hair growth should be at least 1cm long before waxing for best results. Any shorter and the wax may not be able to grab the hairs and remove them properly,” Dani told us. No point in pain without any gain, right?
Rule 2: “Make sure you choose a wax from a good quality, reputable brand so that you get the results you desire. Veet is one of our faves; they offer different types of wax that allow you to choose your preferred method of removal. They have pre-prepared wax strips that you just warm in your hands, apply, and remove, which are really easy to use. They also have electrical wax rollers that are a great option for areas like the legs and the arms, which allow for smooth and even application of wax.”
Rule 3: “Avoid wax if you’re taking any vitamin A derivative, retinol, Accutane, or Roaccutane,” Dani warns. “These can make skin sensitive to waxing and should be avoided completely during treatments and even up to six months after, depending on your skin.” You should also avoid doing a DIY wax when you’re on your period (or just before) as your skin’s more sensitive, so it’ll be more painful. You should also avoid waxing after a hot bath as your skin will be much softer, and you risk taking off a layer of skin as well as the hair – not fun!
Posts You'll Love:
Here’s How to Do A DIY Brazilian Wax at Home
STEP 1: Exfoliate
“Gently exfoliate your body the day before you plan to wax. This will remove any dead skin build up and lift any shorter hairs that may be trapped under excess skin. Make sure you exfoliate between waxes as well, to prevent ingrown hairs” says Danni. The Thankyou Botanical Geranium & Rosewood Coffee Scrub, $15, is perfect as it’ll gently buff away dead skin while the essential oils will moisturize and prep the hair for removal. The Bliss Bump Attendant Ingrown Eliminating Pads, $22, are also great as they contain chemical exfoliants; salicylic and glycolic acid, which will remove any dead skin while antioxidant green tea will smooth and soothe the skin.
 via Giphy
STEP 2: Cleanse and prep the area
Dani tells us; “Before waxing, make sure you’ve cleansed the area and removed all oil or moisturizer. Some waxing products have pre-wax cleansing wipes, these can be used, or you can simply have a warm shower (not hot!).” The Hive Pre-Wax Cleansing Wipes With Tea Tree Oil, $5, are great as they’re infused with antibacterial and anti-inflammatory ingredients like tea tree and lemon to cleanse the skin. Alternatively, to soak up any moisture and protect the skin, apply a little talcum powder before your bikini wax – it’s old school, but it works!
STEP 3: Prep the wax
Depending on your wax, you’ll prepare it a little differently case-to-case, so always read the instructions. Dani adds “Some products require application with a spatula. Some pre-prepared wax strips can be applied directly to the skin.” If you’re heating the wax, Dani recommends to always “Test the temperature of the wax. To do this, apply a small bit of wax to the inside of your wrist; it should feel warm, but it shouldn’t burn!” If you’re a regular DIY waxer, it’s a good idea to invest in a wax pot (which you can buy on Amazon, $15) to ensure the wax remains at the correct temperature.
 via Giphy
STEP 4: Apply the wax
Depending on the type of wax, you’ll apply it slightly differently. Although Dani says that regardless, “Whether you’re using pre-prepared waxing strips, strip wax with a spatula or roll on wax from an electrical wax heater, make sure you always check the direction of your hair growth before you apply. Once you’ve checked, apply a thin layer of wax following the direction of your hair growth. Strip wax should be applied following the direction of hair growth. However, roll on machines don’t require spatulas; they’re applied directly from the roller to the skin and then removed with a strip.”
STEP 5: Pull it off (OUCH)
 via Giphy
BE WARNED: “DO NOT wax over the same area more than twice. This can lead to skin sensitivity and worst case, skin being removed!”
When applying the wax, do small areas at a time, which makes removal easier. Also remember to make the skin taut by pulling the surrounding skin, which will make removal easier and – slightly – less painful.
Dani says that you should always “Remove wax strips in the opposite direction of hair growth. Once the wax is applied, place the wax strip down on top of the wax. Hold one edge in place with your hand and use the palm of your other hand to smooth the strip to the skin (in the direction of hair growth). Make sure you apply pressure so that all the wax sticks to the strip. You should also ensure that the edge of the strip that you’ll hold to remove the wax strip, is not applied over wax so that you can easily lift it from the skin. Wax strips should be removed by pulling back against hair growth using a parallel motion – do not pull the wax strip upwards. Repeat the process until the entire area is hair free!”
STEP 6: Post-Bikini wax
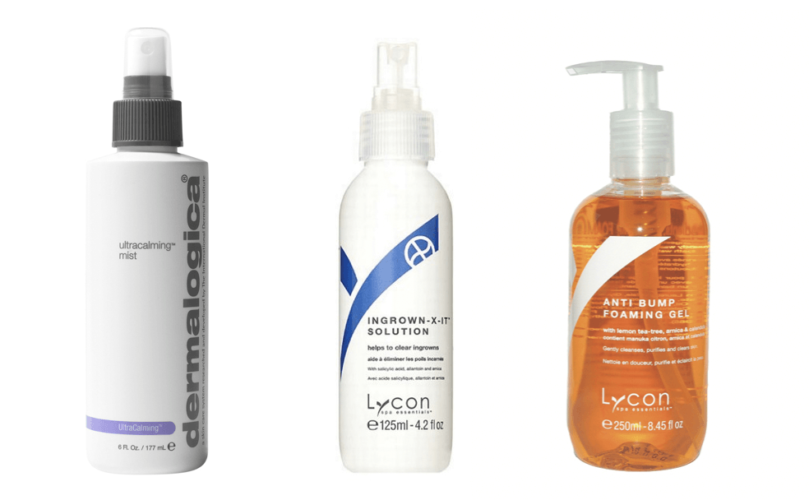 Source: Dermalogica, Lycon
Now the painful part is over, show your skin some love. Wipe away any wax residue with an oil-based wipe. Dani recommends, “Post-bikini wax, apply a soothing lotion or spray to the area. Our favorite is Dermalogica’s Ultracalming Mist, $39, the soothing, anti-inflammatory spray is perfect for all areas post-waxing. It reduces redness, hydrates, and calms the skin. If you’re prone to ingrown hairs, we recommend Lycon’s Ingrown-X-It Solution, $14, as it calms and soothes, but also has the active ingredient salicylic acid, which will gently exfoliate the skin so that new hair growth won’t get trapped.”
STEP 7: Aftercare
“Make sure you leave two to three days for your skin to calm before exfoliating. Our fave body exfoliator is Lycon’s Anti- Bump Foaming Wash, $24.” Dani also says you should “Avoid sun exposure for 24hrs post-waxing. Plus, make sure that you wear SPF if you’re exposed to the sun for three days after the initial 24 hours, as the skin’s more prone to burning.”
STEP 8: Celebrate and enjoy!
You did it boo.
 via Giphy
If that sounds too scary and you want to shave instead (we get you!), make sure you read this post to find out how to avoid shaving rashes. If the au naturel vibe is more your thing, then check out these celebs who are vibing with you.


 Daily Habits Will Give You Better Skin")


 Transformed Our Skin On Another Level")
Leave a comment