15 Beauty Blender Hacks That Will Give You Flawless Makeup

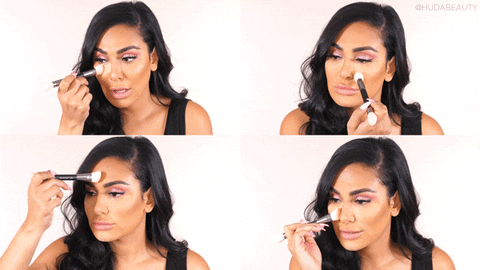
Sometimes we ask ourselves: what was life like pre-beautyblender? It definitely wasn’t as flawless. We know this may sound a little dramatic, but we use all our different makeup sponges every single day to apply everything from highlighter to powder, even eyeshadow sometimes – yes, this is actually a thing! A makeup sponge is undoubtedly the most diverse tool in our makeup bag and always comes through to create a super airbrushed finish. Here are our fave beauty blender tips and tricks:
1. Don’t Waste Products: Use a Primer
Before you apply your foundation, massage a drop of primer directly onto your sponge. This will act as a barrier preventing the product from being absorbed into the sponge. It also helps create a more seamless finish as the primer helps hydrate and smooth the skin – we were so impressed with the results, we do this every day with our Huda Beauty Water Jelly Hydrating Primer.
2. For Full-Coverage Foundation: Use a Dry Blender
To create a full coverage finish with any foundation, apply your foundation with a dry blender using a stippling motion, the damper the blender is, the more foundation is lifted off your skin. Stipple (when you use a light tapping motion) to apply your foundation, gently pressing the product into your skin for maximum coverage. Whatever you do, avoid dragging your blender as this will lift the product off and won’t give that airbrushed finish you’re looking for.
3. For Freckles: Remove Your Foundation
If you have freckles on your nose and cheeks, bounce a clean part of your damp makeup sponge over the tops of your cheekbones and the bridge of your nose. This will pick up more product, lifting the foundation off your skin and allowing your freckles to peek through.
4. For Dewy Skin: Use a Damp Blender

Dewy skin is a trend we’ll always love and the easiest way to get it is by using a damp makeup sponge to apply your foundation. This hack is great as it works with all foundations – even full coverage! Just soak your sponge in water and squeeze out any excess before you apply your foundation.
5. Fix Cakey Makeup: Blot
If you’re looking to fix patchy makeup, like when you’ve worn sunglasses and half the makeup on your nose has disappeared, the easiest way to do it is to use a damp beauty blender with a little foundation or concealer. First, use a tissue or blotting paper to blot away excess oil. Next, apply a couple of dots of concealer or foundation to the offending area (we find a full-coverage cream formula works best), then using a damp makeup sponge (dry works if you’re on the go), and gently blend the concealer using dabbing motions. This method works because it fills in any areas of missing makeup, while also seamlessly blending it with anything left on your face. It’s ahhhmazing! Real Techniques have one of our fave makeup sponges that also comes with a case, $7, so it’s great for keeping in your bag for patchy makeup emergencies.
6. Soothe Flakey Skin: Apply Oil
If you have dry, flaky skin you can smooth it over using a beautyblender and a drop of oil. Simply apply one drop of any facial oil to your makeup sponge and gently buff it into your skin with a beautyblender using small circular motions. The oil will hydrate and smooth while the blender gently removes any flakes.
7. To Brighten Your Under Eyes: Apply Baking Powder
We bake daily and the easiest way to apply your baking powder is by using a beautyblender (obvs). It gives your makeup a stunning airbrushed effect while simultaneously locking your look in place. To bake, start by grabbing a damp makeup sponge and apply a layer of setting powder using a tapping motion on the areas you want to brighten and set. Leave the powder on for three to five minutes then sweep away the excess using a fluffy brush. For more baking tips, check our ultimate baking guide.
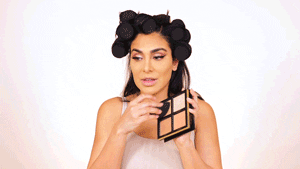
8. For Quick, Even Eyeshadow: Use a Mini Blender
As hard as it might be to believe, using a dry, mini makeup sponge is an insanely easy way to apply eyeshadow. Just dip in the corner of your mini makeup sponge into your matte or shimmer shadows and dab the pigment into your lid. It helps you achieve quick and even coverage of mattes, and it gives insane color payoff of shimmer shadows! Use your fingers to pinch the blender for precise application. Honestly, once you’ve tried this you’ll be hooked!
9. For a Seamless Finish: Apply a Cream Blusher or Highlighter
Our fave way to apply cream blush or liquid highlighter is by using a blender. It provides a really stunning, natural finish that looks super youthful. Apply your blush before your highlight, and start at the apples of your cheek, moving upwards along your cheekbones. Then layer your cream highlighter on top using our all-time fave setting spray highlighter hack (see hack 12!). If you’re on the go and you don’t have any blusher to hand, use a blush-colored lipstick and your blender, it works so well!
10. Remove Excess Blusher: Blot and Blend
If you ever go a little overboard on the blush – it happens to the best of us – use the clean part of a damp makeup sponge to blot it away. Simply blot the blush, pushing the blender gently into your skin so that the blender will pick up the excess powder. If this still doesn’t work, dip your blender into a little translucent setting powder and lightly bounce the blender on top.
11. Restore an Old Makeup Sponge: Cut it in Half
If your beautyblender is looking a little gross, give it a new lease of life by cutting it in half with a standard pair of scissors. This will create a flat edge that is perfect for powder application.
12. Set Your Makeup: Apply Setting Spray with a Blender

This has to be our all-time fave makeup hack – it’s literally life-changing. It makes your skin look lit from within, giving you the ultimate healthy glow while simultaneously setting your makeup. Mist a makeup sponge with setting spray and use it to apply a cream highlighter by pressing the blender into your skin. Begin by applying it to the highpoints of your face that you’d usually highlight, then dab it everywhere else to set your makeup and give your skin a gorgeous glow. For more deets check out this post.
13. Control Shine: Blot
If your skin is looking a little greasy and you don’t have any blotting paper to hand, blot the oil away with a beautyblender. Just press the sponge into your skin and it’ll absorb the oil instantly! Just make sure you clean your beautyblender afterward so it doesn’t harbor bacteria and sebum that you could transfer back onto your skin the next time you use it.
14. Fix Botched Makeup: Soften Using a Blender
On the days when nothing in your makeup routine is going to a plan, a beautyblender is your saving grace. Drawn your brows on heavily and the front of the brow is too harsh, dab a beauty blender gently onto the skin to soften the pigment. Your wing is looking a little messy? Clean it up using a drop of concealer and the sharp edge of your blender by tracing it underneath the wing.
15. For Healthy Skin: Clean Your Blender Daily
When it comes to beautyblender cleaning hacks, we’ve tried them all (including this adorable mini washing machine). But by far the easiest way to clean your blender is to run the blender under warm water and rub it against a bar of soap until the water runs clear. Then gently squeeze out any excess water, then gently squeeze in a towel or tissue, and you’re good to go. It takes less than 30 seconds!
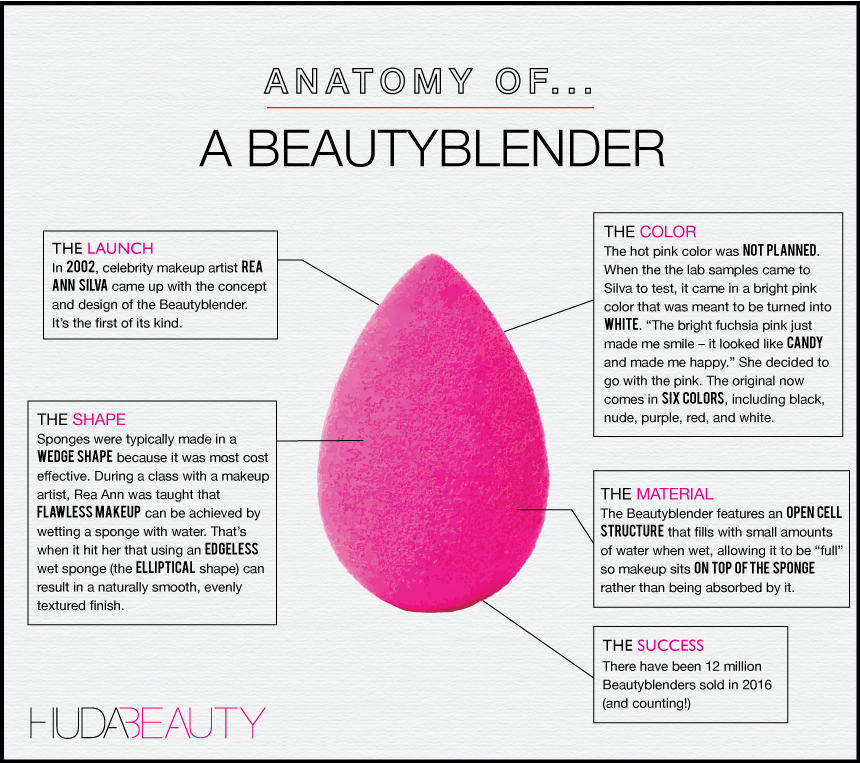
For more makeup tips, check out five makeup tips you need to know. And in case you wondered, here’s all the deets on the anatomy of the iconic beautyblender…


 Daily Habits Will Give You Better Skin")


Leave a comment