


Baking 101: How To Bake Your Face Like A Pro

Let’s talk about baking your makeup. Baking my face is one of my favorite things in the whole world. I literally do it every day to set my makeup in place and ensure it lasts all day!
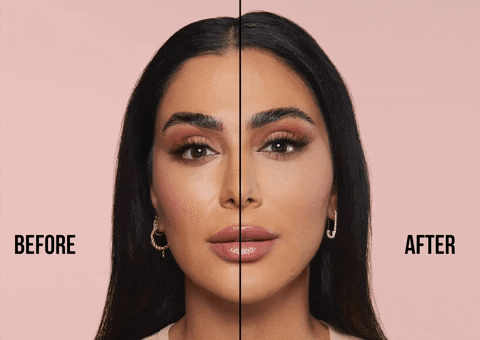
Baking your makeup is a setting powder technique started by the drag community that gives your makeup a long-lasting creaseless, poreless, and airbrushed finish. The process involves letting a thick layer of powder set on the skin before brushing away the excess powder after around five minutes. It may seem intimidating or time-consuming, but dw, the end result looks natural, and it’s basically an extra 20 seconds in your morning routine. The result of baking? Fewer touch-ups, less mascara smudging, and it gives your makeup this super lifted, filter-finish that lasts FOREVER. Here’s how to bake your makeup like a pro.
What You Need to Bake Your Makeup Like a PRO
Setting Powder: Look for a setting powder that’s finely milled so that it blends and melts more seamlessly with your makeup. Tone is everything, so look for a powder that has different shades that will complement your skin tone.
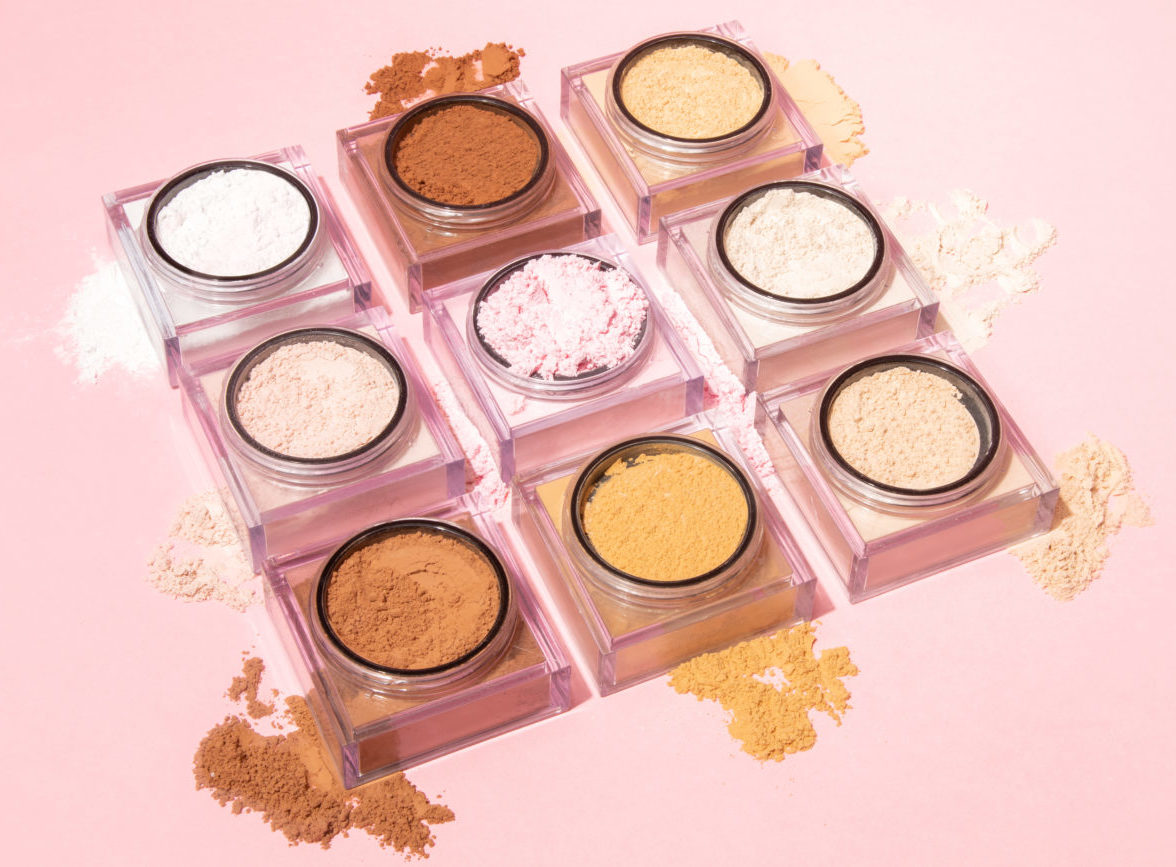
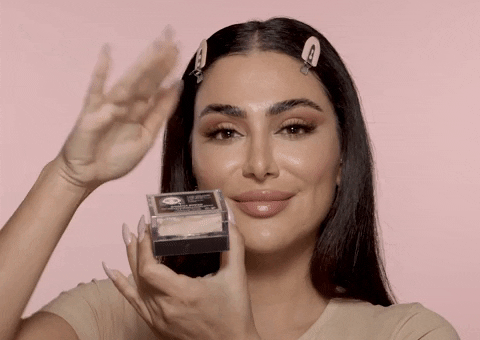
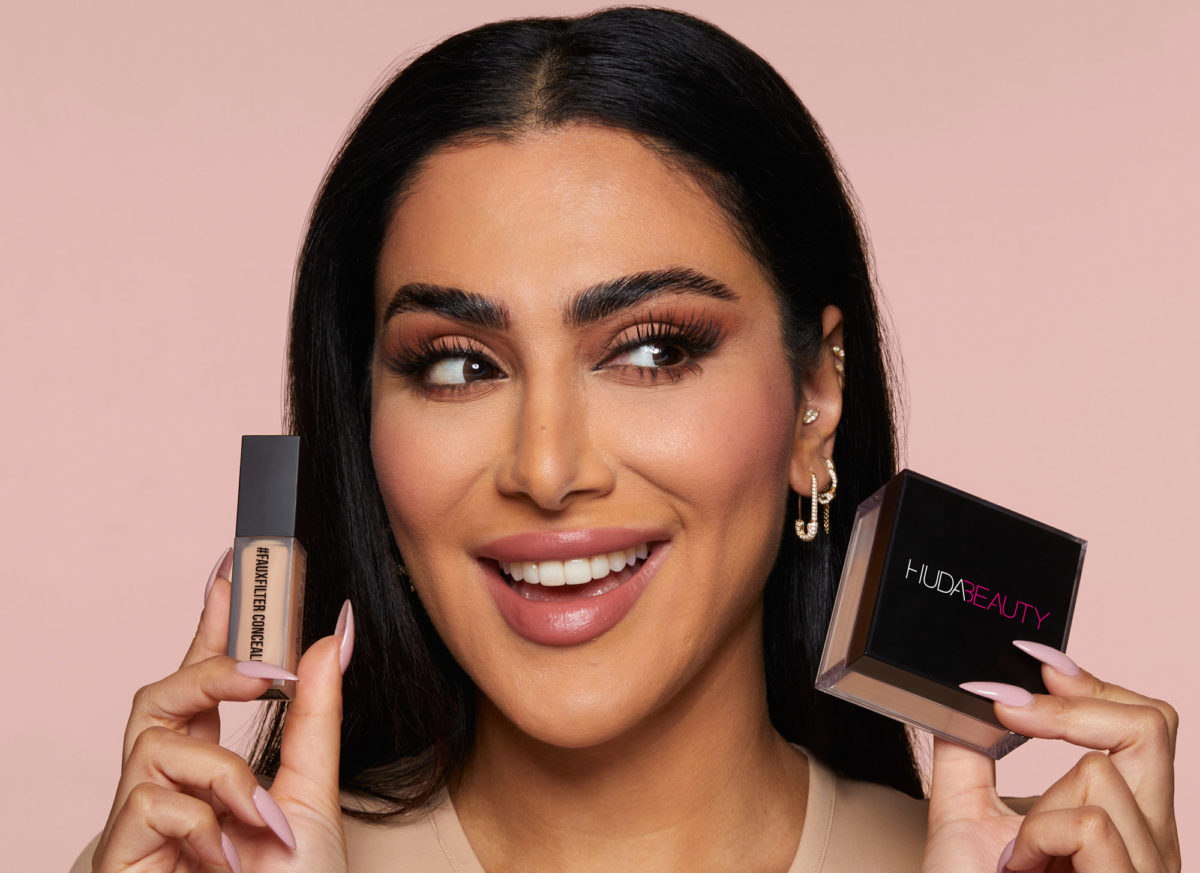
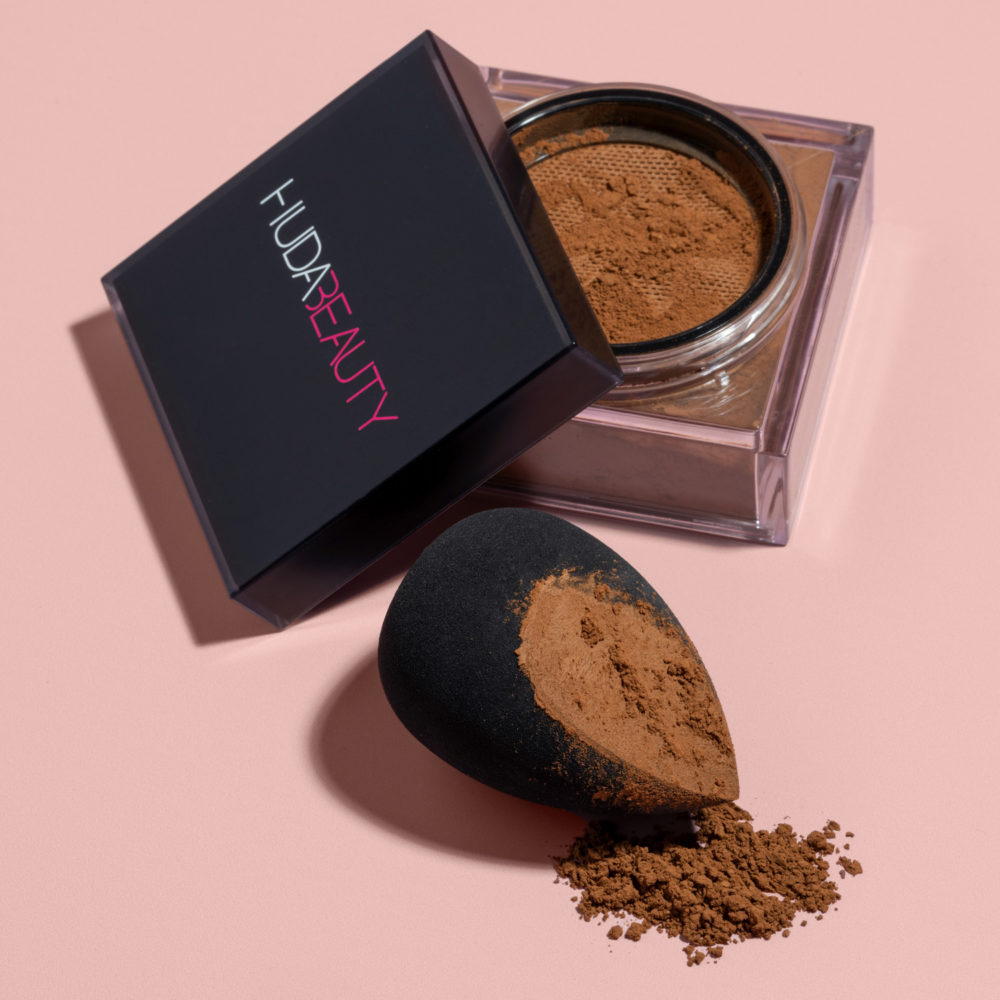
We designed our weightless Huda Beauty Easy Bake Loose Setting Powder, $35, to make baking as foolproof as possible: the powder is really finely milled, gives a matte yet luminous finish, controls shine, plus it has zero flashback! The powder also comes with a unique netting so that it’s easy to use, and you get just the right amount of powder for baking.
Easy Bake is available in nine shades, so there’s a shade to help brighten, color-correct, and complement every skin tone. We recently dropped a new shade that went viral on TikTok, named Cherry Blossom, which has a pink undertone to cancel out undereye shadows and leave you with a soft, rosy glow. Oh, and Easy Bake is available in two sizes; a standard and a mini, which is perfect for anyone on the go!
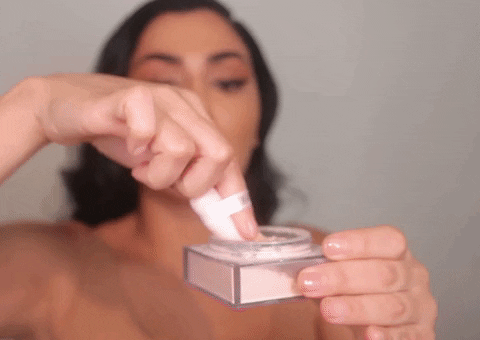
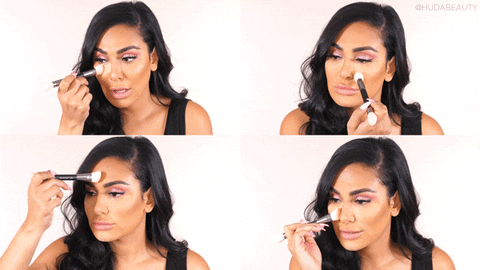
The Tools: To apply my Easy Baking Loose Setting Powder, I currently use a little powder puff as it presses the powder into your skin really well to give that airbrushed finish. You can also use a damp makeup sponge (we love this$7 option). Then, to lightly remove any excess powder, simply use a small/medium fluffy brush.
Posts You'll Love:
How to Bake Your Makeup
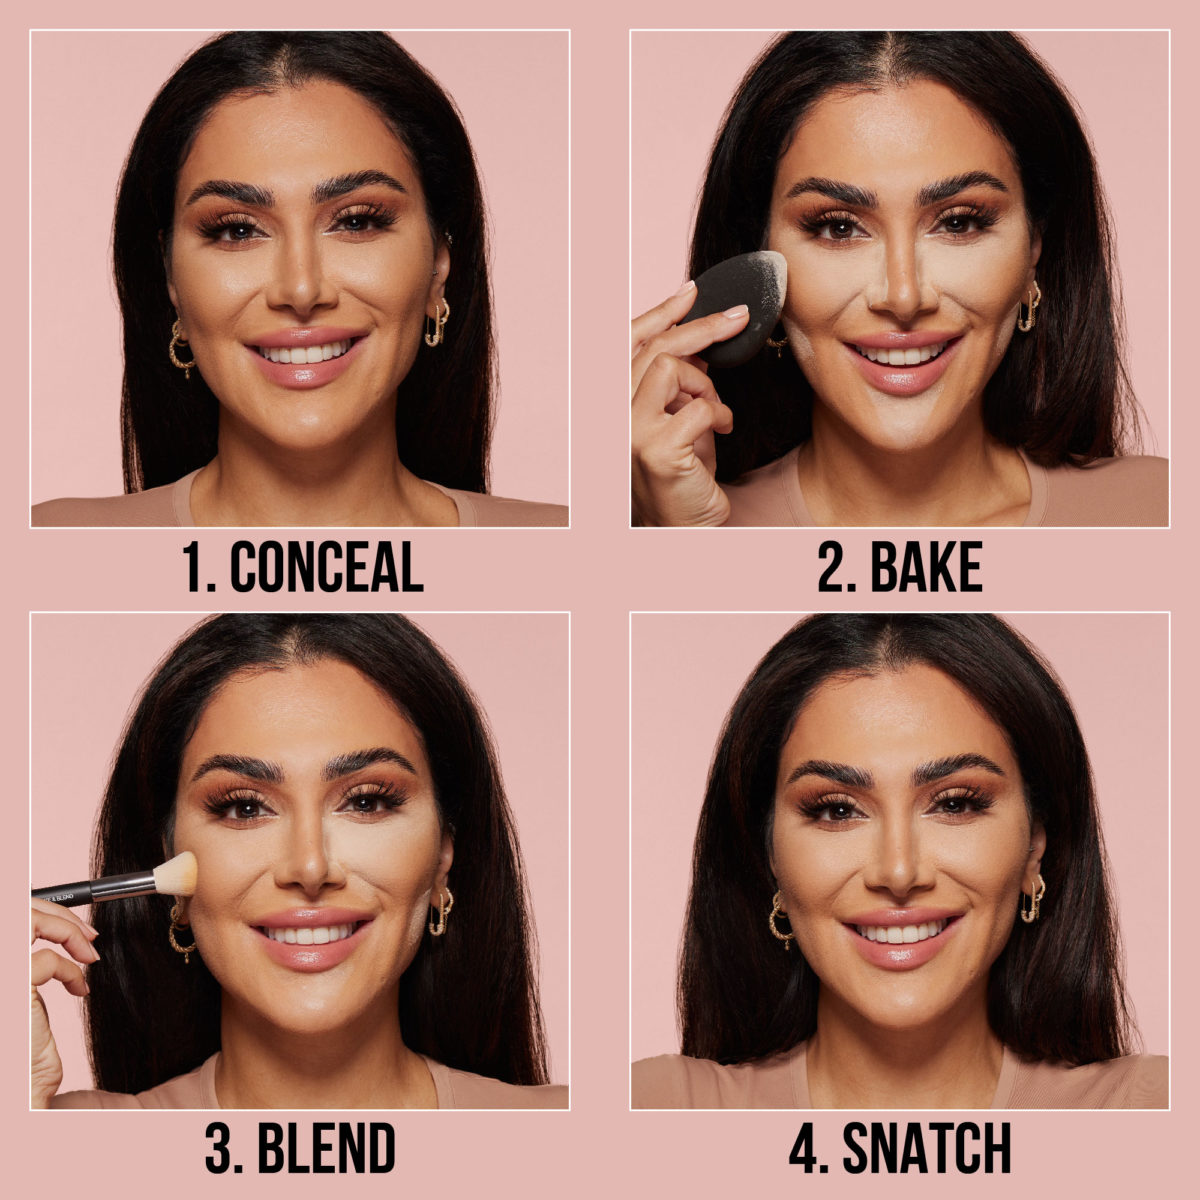
Step 1: Lay Your Base
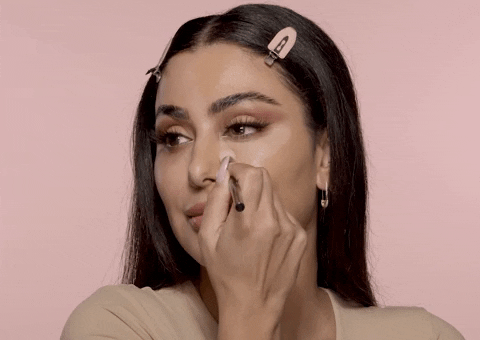
Start by applying your complexion products – to bake, the powder needs some kind of liquid formula to grip. I like to apply all my complexion products, then set it with powder, as I pretty much bake everywhere. Plus, it’s a really great way of sharpening up a smoky wing and helps prevent your mascara or liner from smudging throughout the day.
My fave pre-bake base is our #FauxFilter Luminous Matte Concealer, $29; it blends SO seamlessly and has a buildable formula, so whether you want light or heavy coverage, you can use it your way.
Step 2: Dip & Bake
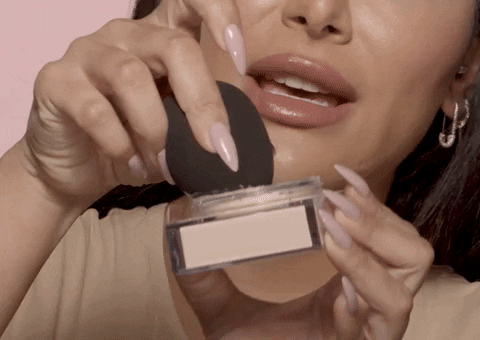
Once your base is down and fully blended, dip your powder puff, damp makeup sponge, or dense brush into the powder and apply a thick layer of setting powder (using a dabbing motion) on the areas of your face you want to brighten and set.
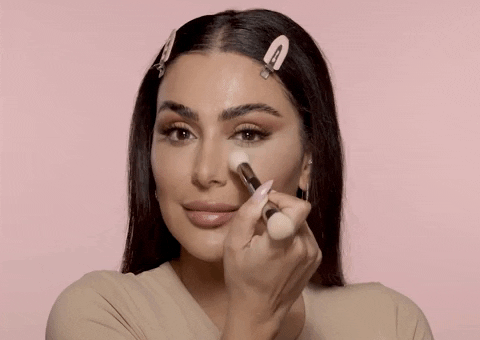
Step 3: Blend, Blend, Blend!
Once you’ve let it set for three to five minutes (whatever you have time for), simply dust away any excess powder using a fluffy brush.
Tip: We recommend letting the powder sit for up to five minutes if you know you’ll need your makeup to last from dawn to dusk, or just three minutes for a lighter bake.
Before & After Baking Makeup Results
My Signature Baking Technique
View this post on Instagram
I like to bake pretty much my entire beat as I think it brings your whole makeup look together in such a lifting, beautiful way and is just *chef’s kiss.*
Where to Bake Your Makeup
The main area I like to bake is my undereyes. I literally start from the inner corner of the undereye, from the bridge of my nose, extending it all the way to the tail end of my brow. This prevents any creasing or smudging, but it also helps lift and snatch.
Next up, I bake my smile lines, as this is an area where my makeup tends to crease throughout the day. When I’m doing full glam, I also like to bake underneath my cheek contour, which creates more contrast and makes my contour pop. I start under the outer corner of my mouth and follow the shadow of my cheekbone until it reaches around the midpoint of my ear. Finally, I apply any excess powder to my chin and forehead to control oil and keep those areas matte.
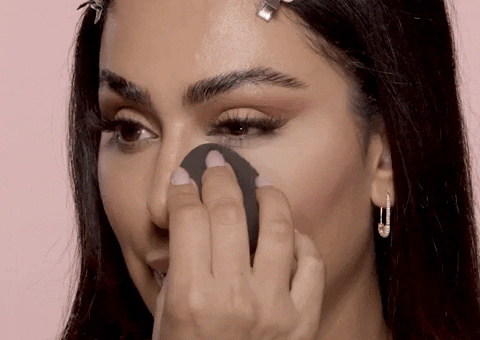
You can even bake the corners of your nose to prevent your makeup from moving around, as this is somewhere that tends to get oil buildup if you have combo or oily skin.
When dusting away excess powder, start with the areas you want to look less defined. I start with the nasolabial fold, chin, and forehead, before dusting away the line underneath my cheekbone and undereye area.
My Top Tips For Baking Your Makeup
Baking Tip #1: Snatch, Bake & Set!
To get that super lifted and fresh undereye, using the right concealer shade and baking your makeup is key! To find your snatch shade, use a concealer that is roughly four shades lighter than your foundation (or your concealer match) – this will brighten and highlight the undereye to give that lifted look. Once that’s blended out, use powder to bake your undereyes; this not only adds to the brightening but ensures your concealer stays flawless, crease-proof, and looks airbrushed all day long. Check out our shade guide here to get your shade match.
Baking Tip #2: Choose Your Tool
When it comes to baking, you can apply a dense layer of powder with a damp makeup sponge or a powder puff.
A damp makeup sponge tends to pick up slightly less powder and gives a very seamless application as it perfectly presses the powder into the contours of your face. This technique is great when you’re opting for a more natural look but still want that flawless undereye that lasts all day. Check out our Basic B Makeup Sponge for an airbrushed finish.
A powder puff often picks up more powder and therefore applies a denser layer of powder to your face. This is ideal for full glam and those who love a heavy bake to really snatch makeup.
For the last step, opt for a medium/ small fluffy brush (a third of the size of your face powder brush), as this will give you good control and precision when dusting away excess powder.
Baking Tip #3: Apply Blush After Baking
Baking needs a little time to set into your skin, but that doesn’t mean waiting around. Use the time to apply eyeshadow – the baking powder will catch any shadow fallout and can be easily dusted away – do your brows or set the rest of your face and contour. Our one rule is to always blush after baking, this ensures there are no obvious lines, and the blush is seamlessly blended on the cheeks.
To level up your baking skills even more, check out these common baking mistakes.