19 Foundation Hacks That Will Change Your Life

Foundation is a total game changer, and possibly one of THE most integral parts of any beauty look. If the shade is off or the blending isn’t on point, it can ruin the whole look. Achieving flawless foundation is also a major skill and there’s a lot of room for error – even the most seasoned pro can have a day where their foundation just does not behave! Remember, the aim is always to achieve incredible, healthy-looking skin not great foundation, and that’s what we’re going to help you do with these epic hacks and tips.
Fortunately for you, we’ve spent more time than we could possibly count playing around with different formulas (yes, it’s fun), mixing and matching products to achieve that flawless final look, and we’ve learned a lot along the way. Here are our ride-or-die foundation hacks that never let us down.
1. For Flawless Skin: Prep is Key
Flawless makeup always starts with a great, hydrating skincare regime. The reality is, the better hydrated your skin is, the less likely your makeup will look cakey. Start by cleansing, then follow step two below (if you have time). Then, after toning, prep your skin with a hydrating essence to add a surge of moisture (find our go-to essences here), and finish with a plumping moisturizer like the WISHFUL Honey Balm Jelly Moisturizer, $49. Not only will the formula restore uneven skin tone and brighten skin with continual use, but it’ll also instantly soften the appearance of pores making it the ultimate makeup pre-game!
2. To Avoid a Cakey or Patchy Look: Exfoliate First
Beautiful, glowing skin is our number one goal RN, and the easiest way to achieve a radiant glow is by exfoliating before makeup application. Without regular exfoliation, your foundation runs the risk of looking cakey or patchy, as it clings to dry skin and texture. Of course, our go-to exfoliator is the WISHFUL Yo Glow Enzyme Scrub, $39, which combines pineapple and papaya enzymes to brighten and AHAs and soft cellulose to gently buff away dead skin, leaving smoother, glowier skin in its place. The best part? As it’s gentle enough for daily use, it’s ideal for daily makeup prep!
3. To Find the Right Foundation: Always Read the Label
It might sound obvious, but you should always read the label before purchasing a new product, especially a new foundation. First of all, check if a recommended skin type is listed; a hydrating formula is perfect for dry skin but it might not wear well on oily skin. Also, be mindful that oil-free foundations often oxidize (the shade becomes deeper) on oily skin throughout the day, so always ask for a tester before you buy.
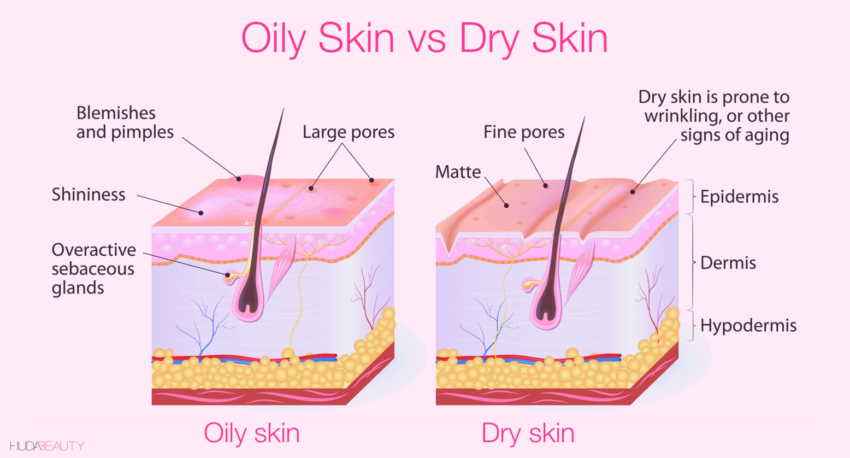
Another factor to consider is SPF, as most SPF foundations contain zinc oxide or titanium oxide, which can cause flashback, AKA when your foundation gives you a grey-ish look in photos. Either avoid using foundations with SPF at nighttime or set your foundation with a tinted loose powder to eliminate flashback.
4. For the Ultimate Shade Match: Buy Two Foundations

If a foundation you love doesn’t have the perfect shade match for you, buy a foundation that’s one shade lighter than your skin tone and one that’s slightly darker, then combine the two. While we know this is a more expensive option, it does just mean that both formulas will last longer. Plus, it’s perfect for when the seasons change, as you can use more or less of one shade depending on how much fairer or deeper your complexion gets.
One other important factor in choosing a foundation is making sure you match it to your neck and chest. It’s very unusual to have one consistent skin tone all over your face and body, so if your face is paler than your neck and body, then find a comfortable match that will blend well with your neck and chest.
5. For the Perfect Shade: Figure out Your Undertone
Finding the right undertone is key to shade matching like a pro-MUA. There are three key undertones: warm (golden, red, and yellow undertones), cool (beige and pink undertones), and neutral (a balance of gold and pink undertones). To determine your undertone, look at the veins on the inside of your wrist; if they’re green, you have a warm undertone (the yellow in your skin acts as a filter and makes your blue veins look green), and if they look blue, you have a cool undertone. Neutral undertones will see a combo of green and blue veins. For more tips on finding your undertone, read this post.

6. For Even Coverage: Use a Primer
Ask any celeb MUA and they’ll tell you that using a primer is non-negotiable. Not only will it help you achieve a more seamless finish, but it’ll also improve the longevity of your makeup. Plus, many primers contain beauty-boosting ingredients to provide an extra surge of hydration and amp up your glow game. We’re currently obsessed with the new Huda Beauty Water Jelly Hydrating Primer, $33, as the ultra-hydrating formula creates the perfect canvas that grips makeup in place for flawless all-day wear.
7. For Dewy Skin: Use a Damp Beauty Blender
Dewy skin gives such a healthy and fresh appearance. To achieve this look, it’s important to opt for a radiant skin-finish foundation (not a matte formula) and a damp makeup sponge to apply your foundation. Just soak your sponge in water and squeeze out any excess before you apply your foundation – this works so well because it gives such an airbrushed, lightweight look.
Tip: If you have freckles on your nose and cheeks, bounce a clean part of your makeup sponge over the top of your cheekbones and the bridge of your nose to pick up excess product and allow your freckles to peek through.
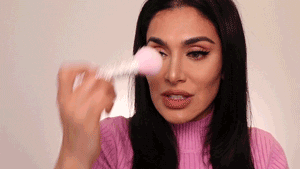
8. For a full-coverage finish: Use The Stippling Technique
For fuller coverage, stipple the foundation – use a light tapping motion – onto your skin. By carefully pressing the product into your skin it provides maximum coverage. The dome-shaped end of our new Huda Beauty Face | Build and Buff Foundation Brush, $33, is perfect for this technique.

Tip: Spritz your brush or blender with a little setting spray to keep your look on lockdown all day.
9. For Extra Coverage Without the Cake: Use Concealer
If you need more coverage, it can be tempting to empty half the bottle of foundation and smother it on your face, but please don’t! Instead, find a good full-coverage foundation and concealer. One layer of a true full-coverage foundation should be enough, then use a concealer to target any areas that still need coverage. Check out our top full-coverage foundations here. We love the Benefit Boi-ing Cakeless Concealer, $22, which gives great coverage with a very natural finish.
Tip: Celeb MUA, Sam Fine, recommends, “After applying foundation, separate a two-ply tissue and use one-ply to blot any excess oil to achieve a more skin-like finish.”
10. For Lighter Coverage: Mix in a Hydrator
For a dewier, more lightweight finish, mix your foundation with a drop of moisturizer or a hydrating primer. For a more luminous finish, mix your foundation with two drops of a face oil, then apply with your hands to achieve ‘yoga skin,’ AKA skin that’s so radiant, it looks fresh outta yoga class – this is great if you tend to have dry skin.
11. For Cream Foundations: Melt Them!
Celeb MUA, Sam Fine, suggests using a “blow dryer to make crème foundations more malleable, blendable, and move across the skin with ease.” Honestly, this works like a dream, especially with stick foundations.
With that said, our new Huda Beauty #FauxFilter Skin Finish Foundation Stick, $39, doesn’t need any heat – it literally glides onto your skin, delivering the most stunning natural, glowing skin. It’s our new holy grail foundation!
Posts You'll Love:
12. For Luminous Skin: Add a Glow Enhancer
Mixing your foundation with a glow enhancer will instantly give your skin a luminous finish, without compromising wear. We’re obsessed with the Physicians Formula Spotlight Illuminating Primer, $16, as the pearl pigments are universally flattering. Charlotte Tilbury’s Hollywood Flawless Filter, $44, is another cult classic; Charlotte told us “I’ve used this on so many of my celebrity friends to give them a gorgeous, flawless filter before all the cameras on the red carpet.” Just mix one or two drops of a liquid highlighter in with your foundation for a gorgeous, glowing finish.
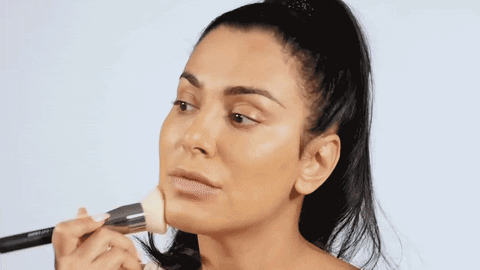
13. For a Natural Finish: Apply With Your Hands
If you want a more natural, skin-like finish, try applying your foundation with your hands; the heat of your hands helps to melt the formula into your skin so it doesn’t look cakey. This technique is a firm fave among makeup artists. First, warm the product between your fingertips, then apply using outward circular motions. You can either gently pat and blend with your fingers or fine-tune with a damp makeup sponge after working in with your fingers. Don’t forget to blend with your neck.
14. The Pro Tip: Keep Your Moisturizer Damp
A big no-no according to celebrity makeup artist Sir John is letting your moisturizer dry before applying foundation. Beyonce’s glam guru’s signature move is “making foundation look like second skin,” so when you apply yours, make sure it’s on skin that’s still a little damp from moisturizer. “This helps with the blending process, and if you don’t do this then the foundation just sits on top of the skin,” he explains. Sir John swears by the L’Oréal Paris Hydra Genius Daily Liquid Care Moisturizers, $18 (for dry or oily skin), to plump, and the L’Oréal Paris Infallible Fresh Wear Foundation, $15. “This combo gives you a flawless look with no cakiness,” he adds.
15. For Brush Application: Work Outwards
 Source: Morphe
Start by applying the foundation at the center of your face, where redness and blemishes are more common, working outwards to avoid streaks and visible brush strokes. For blendability, we like to use a rounded brush with synthetic hairs. We love the Morphe M439 Deluxe Buffer Brush, $16 – it’s iconic for a reason!
16. For Long-Lasting Foundation: Powder the T-Zone
To ensure your foundation stays in place all day, set it with a powder, like our Easy Bake Loose Baking & Setting Powder, $34. It’s important to use as little as possible to maintain a fresh, skin finish. Start by applying to areas that tend to get more oily, like your T-zone (along your forehead, the bridge of your nose, and your chin) then use what’s left on your brush to lightly dust it along cheeks and any other areas.
If you have oily skin, we recommend setting all over. Try mixing a little of the Mario Badescu Special Healing Powder, $12, in with your regular powder, as it contains sulfur, kaolin clay, and zinc to balance and absorb oil throughout the day.
17. For 24 hr Foundation: Bella Hadid’s Weird Setting Hack
This weird water-setting technique called Jamsu (which means submerge) involves covering your freshly-caked face in translucent powder and dunking your face in cold water. We learned the tip from supermodel Bella Hadid – it’s supposed to set your makeup and give your skin an airbrushed finish. To see what happened when we tried Jamsu, check out this video. Although beware, this isn’t for your everyday foundation look!
18. For Touch-Ups: Don’t Add More Foundation
To touch up throughout the day, don’t pile on more foundation as this can look cakey. First, soak up any excess oil using blotting paper, then target any areas that need fixing with a little concealer and gently blend out using patting motions with a damp makeup sponge. Add a little powder on top to refresh your look, mattify, and lock everything back in place. We’re obsessed with the Sisley Phyto-Poudre Compacte, $112, which is definitely a splurge, but also the most skin-perfecting powder that’s perfect for keeping in your purse for touch-ups on the go.
19. The Number One Rule: Don’t Forget Your Neck
Nothing gives you away like a line at your jawline; so don’t forget to blend down your neck! If you don’t want to continue your foundation all the way down your neck, continue it underneath your chin and dust a bronzer or matching powder on your neck instead.
Let us know your fave foundation hack in the comments below.
Disclaimer: Every product we review has been independently selected and tested without bias by our editorial team. We never take payment to review products, however, some brands allow affiliate links, so we may earn a commission if you purchase a product by clicking on one of our links.


 Daily Habits Will Give You Better Skin")


Leave a comment