5 Makeup Products All MUAs Use For Flawless Makeup
 Source: Desiree Navarro/Getty Images
It’s no secret that here at HB HQ we’re certified, makeup fanatics. So, as you’d expect we love quizzing makeup artists on their fave products and ride or die makeup hacks. Over the years, through countless interviews with some of Hollywood’s top MUAs, we saw a clear trend with the same five products being mentioned again and again. So, here are five makeup essentials according to MUAs.
1. For Flawless Makeup That Lasts: Setting Powder
No makeup look is complete without setting powder. If you’re yet to experience the magic of setting powder, it’s a super fine, oil-absorbing powder (YAY!), that’ll create a skin-smoothing veil over foundation, helping to blur pores and lock your foundation and concealer in place. For more natural, glowy makeup looks, MUAs tend to use a loose setting powder dusted over the T-zone, but for more glam looks, setting powder is amazing for setting concealer under the eyes, and all over the face.

Legendary MUA Charlotte Tilbury explains; “Once your makeup look is complete, it’s important to finish it off with a finely milled powder to lock in your makeup effortlessly and keep everything from slipping. It also removes any unwanted shine for any pictures.” Finally, it can also be used to bake, aka our fave makeup hack of all time, which brightens the under eye and gives your skin that stunning airbrushed finish. Check out our full baking guide here.
Application tip: To set your makeup, take a large fluffy brush, dip it in your powder then tap the brush lightly to remove excess product. Next, dust it along your T-zone. If you have oily skin, you can sweep or press the brush all over your face, which will help control shine throughout the day.
Our fave setting powders: We love the Laura Mercier Translucent Setting Powder,$39, it’s super blendable and it doesn’t look cakey, which is a must. The Huda Beauty Easy Bake Setting Powder, $34, is another fave of ours (obvs), and we use it daily to bake and brighten. There are eight shades, so you can easily find one that matches your skin tone for a more natural finish.
2. For Seamless Makeup Application: Beauty Blender

A beautyblender, $20, is the most dynamic, multi-tasking tool in any makeup kit. You can use it to apply so many different formulas from powders to liquids, and depending on how you use it, you can customize your finish. Dewy skin? Check. Full coverage, matte? Check. No-makeup makeup check? It does it all, hence why all MUAs never leave the house without it. As the sponge is edgeless, it allows you to achieve a naturally smooth, evenly textured finish… Brushstrokes, be gone! We also LOVE the Real Techniques Miracle Complexion Sponge, $11 for two.

Just remember to wash your beauty blender every day to ensure it’s not harboring any bacteria. The easiest way to clean it is to run the blender under warm water and rub it against a bar of soap until the water runs clean. Then gently squeeze out any excess water and you’re good to go.
Application tip: For a dewy skin finish, apply your foundation with a damp beauty blender, gently pressing the formula into the skin with your sponge. If you apply too much product, use a clean part of the blender to absorb any excess.
3. For Snatched and Sculpted Makeup: Concealer

When you open your mind to the possibilities of concealer, you’ll realize it can do SO much more than conceal; it can brighten, sculpt, and snatch your face when it’s applied strategically. However, with the thousands of formulas, finishes, and shades on offer, it can be a little confusing. The most important thing to get right is the shade. Celeb MUA Ash K. Holm clarifies “If you want your concealer to blend in with your foundation for a natural look, I recommend matching the concealer with your foundation. And if you want to use your concealer to highlight, I like to go one to two shades lighter than your foundation shade – highlighting will lift the face and reflect light,” she adds. For more concealer tips, read this.

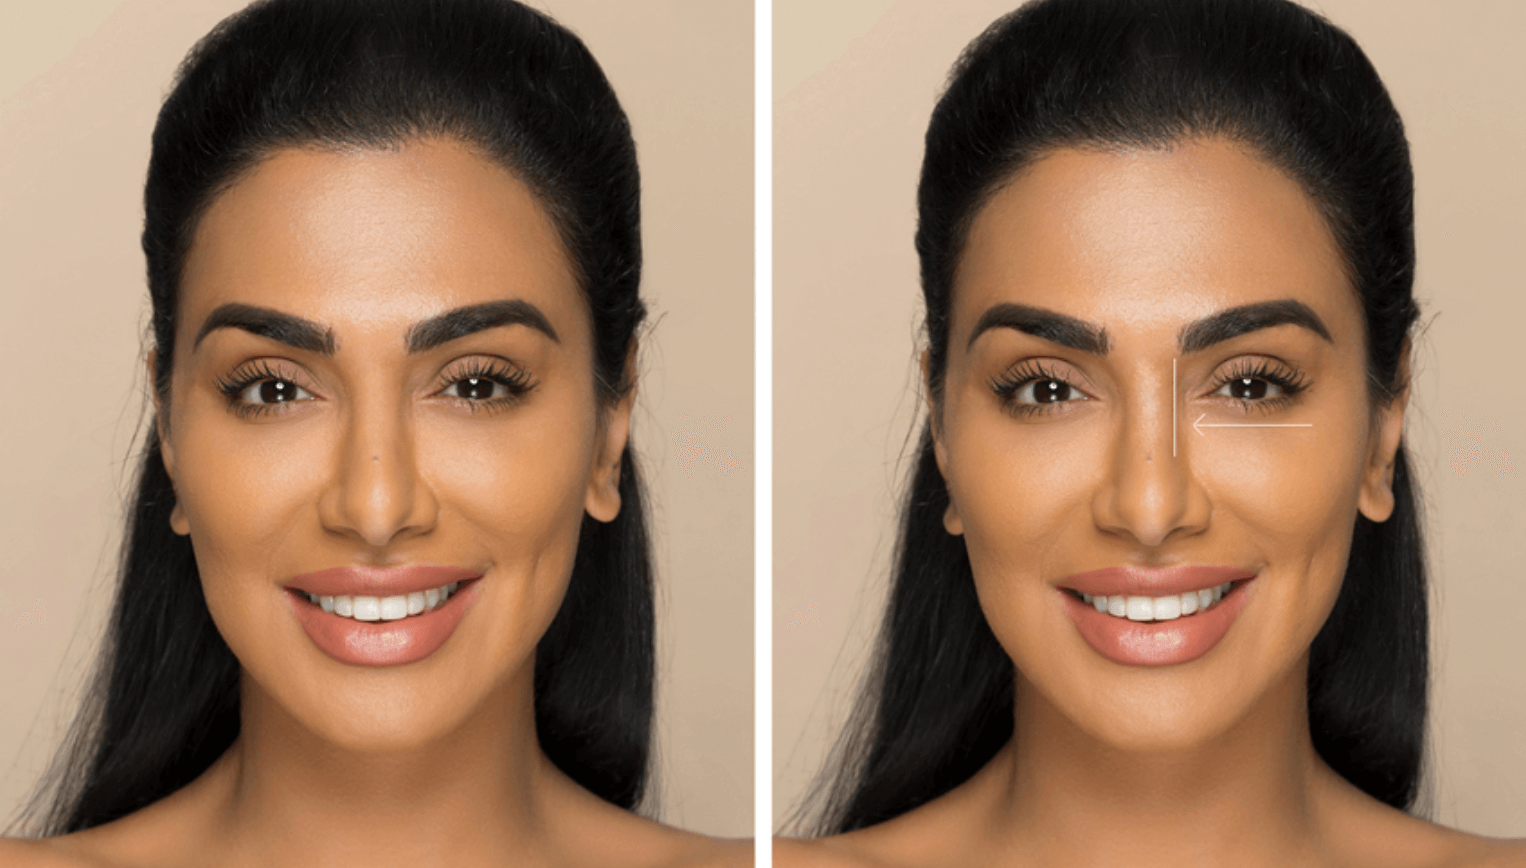
Application tip: Start by applying your concealer under the eye, then drag it up towards the tail end of the brow, which will lift and sculpt your eyes. Don’t forget to blend, blend, blend, so it melts into your foundation. Our blending weapon of choice is always a damp makeup sponge. Check out this post for our fave concealers of all time.
Posts You'll Love:
4. For A Perfect Pout: Lip Liner
You can’t perfect a flawless lip without the help of a good lip liner. Not only does it add definition and prevent lipstick from bleeding, but it’s fundamental if you want to contour your lips. You can also apply it all over the lip to intensify the color and increase the staying power of our lipstick; this works best with soft, wax pencils. Wax formulas are typically longer wearing and have a little more stick, while more creamy liners can feel more comfortable but they don’t normally wear as well. If you’re looking for precision, we’d recommend a classic pencil liner.

Application tip: When we recently spoke to celeb MUA Sam Fine, he shared a liner tip for deeper skin tones; “Nude lipsticks can often go unnoticed on brown skin, so apply a brown lip liner one shade deeper than your skin tone BEFORE applying lipstick, to add dimension and weight.”
Check out our guide to lip contouring for a fuller pout here.
5. For Long, Sexy Lashes: Eyelash curler
 Source: Shumera
Despite the fact that we’re false lash addicts, we cannot live without an eyelash curler and neither can most MUAs. A good lash curler instantly lifts and curls your lashes and can make a dramatic difference to how long your lashes look. So, pair lash curlers with lashings of mascara and you’ve got a match made in heaven.

Celeb MUA Patrick Ta told Elle, “Curling eyelashes is a non-negotiable step for me. It’s an intricate part of my routine when I’m working on clients,” saying his fave lash curler is the Kevyn Aucoin The Eyelash Curler, “because it has the perfect curve even on the roundest of eyes.”
Application tip: Although lash curlers may look a little scary, they’re surprisingly easy to use. Simply place your eyelashes in between the silicon frame, then gently press the top and bottom frame together. Hold for 10 seconds and you’re done!
For more makeup tips, check out the makeup mistakes you need to avoid.


Leave a comment